Posted on

The Benefits of Medical Freezers and Refrigerators

innova freezers

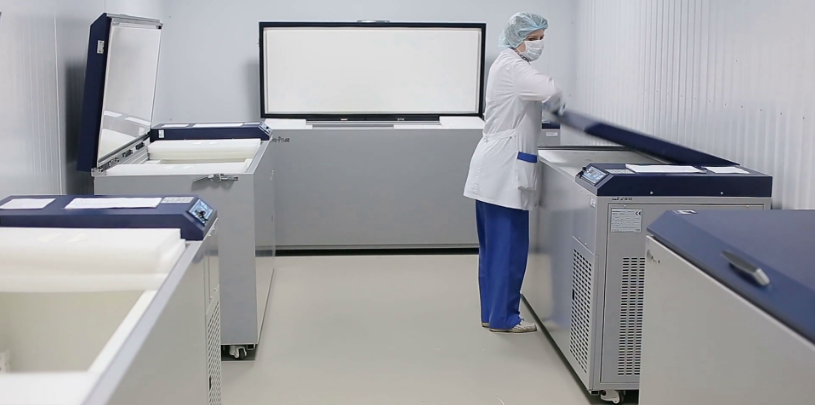
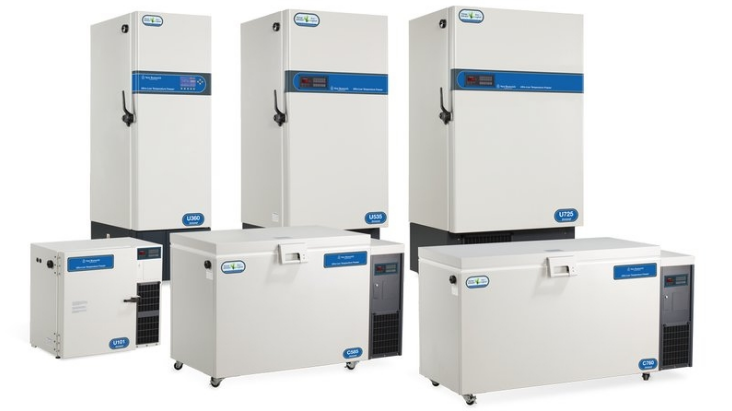
Is it time to upgrade your laboratory freezers and refrigerators to medical grade appliances?  There are big differences between domestic appliances and biomedical ones.The U.S. Centers for Disease Control defines biomedical refrigerators and freezers as purpose-built units, specifically designed for medical and laboratory use. These units precisely measure temperatures with microprocessors and digital sensors, and have fast-temperature recovery systems in place to immediately adjust out-of-range temperature fluctuations. The benefits of medical freezers and refrigerators range from alarms to their specialized sensors and technologies that keep temperatures consistent.

Medical units and laboratories should not use domestic household refrigerators and freezers which don’t adhere to federal guidelines. The CDC recommends replacing outdated equipment with medical-grade refrigerator and biomedical freezer units.

But why? What are the benefits of biomedical freezers and refrigerators, and why are they the best option for your research or medical storage needs?

Medical Freezers and Refrigerators Ensure an Unbroken Cold Chain

Biomedical refrigerators and freezers use temperature monitoring to ensure all items are consistently kept at the right temperature to prevent degradation of samples, biologicals,reagents, and other temperature sensitive materials.

Medical grade freezers and refrigerators also seal tighter than domestic refrigerators to decrease temperature fluctuations. In addition, medical freezers and refrigerators with glass doors allow technicians to find items before opening the door, helping to maintain temperature by limiting the amount of time the door is open.

Biomedical grade appliances are also capable of reaching temperatures far below that of  domestic freezers and can freeze things faster than their household counterparts.

Increased Air Flow

Domestic freezers and refrigerators frequently have glass shelves, which can impede air circulation. Glass surfaces don’t maintain even temperatures, causing instability in your cold storage.

Biomedical appliances are designed with airflow in mind, relying on fan-forced circulation systems, ventilation, and metal or wire shelving.

Alarm Systems

Most pharmaceutical grade freezers and refrigerators have external temperature monitoring devices, or TMD. This allows technicians to keep track of temperatures within the appliance without opening the appliance doors. 

An alarm system alerts personnel that a temperature change has occurred, allowing prompt remediation. A digital data logger (or DDL) keeps track of historical temperature readings, allowing personnel to monitor the length of time a refrigerator or freezer has been operating outside the required temperature range.

All three of these common features of biomedical appliances will increase the accuracy of temperature settings, notify personnel when there’s an issue, and help make rapid adjustments should a problem occur.

Power Outage Protection

Domestic freezers and refrigerators rely on wall outlets, in turn relying on an external energy source. When the power goes out, so do household appliances. 

Medical freezers and refrigerators have backup battery systems they can use in case of a power outage.  

Added Security

Some biomedical appliances have digital locks to control access, protecting your supplies and biologics as well as discouraging laboratory staff from using the refrigerators for personal reasons. 

Cost Savings Benefits of Biomedical Freezers and Refrigerators

All of the above benefits will result in cost savings, whether it’s preventing waste through temperature fluctuations, having a reliable history of freezer and refrigerator temperatures to ensure accuracy in testing, or increasing security to prevent theft or misuse of your appliances.

BaneBio is available to help you upgrade to biomedical freezers and refrigerators, with options for purchasing both new and used equipment as well as for selling us your outdated appliances.


Posted on

How to Determine & Maintain a Laboratory Budget

woman researcher looking through microscope

Whether you’re starting up a new lab or looking to improve or make budget cuts to an existing one, determining and maintaining a laboratory budget is the most important “next step” to take. Underfunded and understaffed; where do you start? Here’s a look at some helpful tips for creating a laboratory budget that you and your techs can live with.

Don’t Just Jump Into Buying Major Equipment

You may be tempted to start purchasing major equipment right away, but the secret to determining and maintaining your laboratory budget is understanding what you “need” and what’s “nice to have.” 

  1. Split your equipment list into several categories, including essential, ancillary, and wishlist. 
  • Essential equipment includes the tools you need to store and test your samples, such as refrigerators, microscopes, and centrifuges.
  • Ancillary equipment is also necessary to support your essential equipment. This list includes tubes, beakers, chemical reagents, and pipettes.
  • Wishlist: This is equipment that you need in the future, although for now you can borrow the equipment from a shared facility.
  1. Don’t forget that common equipment, such as refrigerators or appliances, as well as some supplies including paper towels and cleaning solutions are available at lower prices at some of the big box stores.
  1. Buying used lab equipment is a great way to save money on your lab budget. You can also ask for donations of equipment from other laboratories or partnering labs within your facility.
  1. Always look into purchasing the extended warranties and protections on your equipment to save money on repair or replacement.
  1. Preventive maintenance is a key factor in keeping your existing equipment running efficiently. 

Ongoing Costs

Once your initial setup is complete, it’s time to consider what consumables you will be using monthly. Your employees and team members will have a better idea of how many supplies they use monthly, so their input is a valuable resource.

It may take you a month or two to get the most accurate picture, but it’s estimated that an average sized lab will spend around $1000 a month on supplies such as pipettes, gloves, tubes, and slides. Next estimate how many antibodies, enzymes, and testing kits you will need to operate and add this into your basic recurring lab supply cost. Now add the cost of cleaning and maintenance supplies, as well as utility bills and rent or mortgage.

Lastly, look at your personnel spend (salaries, benefits, vacation, and sick days) and add that into the ongoing cost list.

Don’t Be Afraid to Make a Change

When balancing your laboratory budget, you may need to switch suppliers to ensure you are getting the lowest prices on your equipment and supplies. If you’re comfortable with the quality of supplies you are getting from your current supplier, don’t hesitate to reach out and try to negotiate a better price.

Be aware that not all suppliers have the same brands and not all brands are equal. Do a little legwork and research reviews on unfamiliar brands and suppliers before partnering with a new one.

Hiring Personnel is One of The Biggest Laboratory Spends 

By far, hiring and retaining qualified lab personnel is one of the biggest laboratory budget expenditures your lab manager will face. Here are a few ways to keep this spend down a little.

Make your lab environment inviting: Not just the lab facilities, but in the job culture. People are willing to take a little less money in salary if they truly love their jobs.

Provide educational and advancement opportunities: You can decrease turnover in your laboratory by providing continuing education and opportunities to advance. You can add a caveat, such as the minimum amount of time an employee must work to qualify for these perks, or negotiating how much time they will need to spend with your organization if they take advantage of educational opportunities.

Go shopping for eager students: Undergraduate and postgraduate students interested in the sciences can provide much of the help you need in the lab. These students can work as assistants in any number of departments. You may be able to contact universities and see if you can offer credit to student volunteers.

Offer great benefits: Circling back to the happy employee, offering great benefits is a way to make the job more inviting when you can’t pay candidates quite as much as a competitor could. A generous vacation policy, affordable health benefits, buy-in retirement plans, or even stock options can be used as leverage for your potential candidates. The costs of these benefits will be far less than the costs of high-turnover rates such as constantly training and equipping new employees.

Determining and Maintaining a Laboratory Budget: Keeping the Records

Now that you’ve created a basic guideline for creating your laboratory budget, it’s time to put it altogether. Excel spreadsheets are one option, but they can be cumbersome and confusing.

Many labs turn to solutions such as Quicken, QuickBooks, and other online budget software.

Once you’ve determined your budget, inform your teams of how it will affect them. Ultimately, it will be a shared responsibility to maintain the laboratory budget.

BaneBio has ways to keep your laboratory running within budget, from used equipment to cost- saving preventive maintenance contracts and repair services. Contact us today and let us show you how we can keep your operations running efficiently and economically.

Posted on

Research Laboratory Equipment Maintenance & Repair Checklist

3 researchers in a laboratory

The biggest investments you will ever make for your lab are purchasing your equipment, and maintaining it to keep it working properly. How do you keep it running safely, smoothly, and accurately? Here is a research laboratory equipment maintenance and repair checklist to keep your equipment humming along.

Start with an SOP

Every piece of equipment, from your microscopes to your biological safety cabinet, should have a clear Standard Operating Procedure relating to it. An SOP ensures that everyone using the equipment understands how to use it properly, and how to maintain it. Being able to prove that you have an SOP can help you in many ways, from regulatory compliance to tapping in to the warranty on a piece of malfunctioning equipment.

Your SOPs should cover, at a minimum:

  • The piece of equipment referenced, as well as the serial number, year, make, and model
  • A definition of any abbreviations used within the document
  • A list of employee job titles who have authorization to use the equipment, as well as any applicable certifications
  • Detailed instructions for proper use of the equipment
  • Detailed description of the maintenance required for the equipment

Keep a separate folder near each piece of equipment, and store all documents that came with the equipment such as guides or maintenance instructions. This is the perfect place to keep records of all maintenance, calibrations, repairs, and routine cleaning performed on the equipment.

If applicable, directions for disposing of any waste or hazardous materials should be included in each folder as well.

Routine Cleaning

Cleaning is an important part of ensuring your research laboratory equipment remains in good working order, with no chance of cross-contamination of your samples. To thoroughly clean your equipment:

Daily: 

  • Wipe down all equipment externally
  • Clean and disinfect your sinks 
  • Organize and sanitize all work spaces

Weekly: 

  • Deep clean the equipment
  • Use a 70:30 mix of alcohol or ether to clean your microscopes
  • Check for expired solutions, such as those needed to calibrate equipment

Calibration

Calibration ensures the accuracy of your test results, making this a very important step in laboratory maintenance and repair. 

  • Post signs reminding users to calibrate
  • Make a running sheet of all results after calibration
  • Ensure that all necessary calibrating supplies are near the machines
  • Keep completed calibration logs in the folder you created for the equipment SOPs

Routine Maintenance

Routine maintenance not only keeps your equipment running smoothly and accurately but it will allow you to notice issues you might have missed such as failing parts, loose pieces, and other potential troubles.

Check the manual supplied with the equipment for manufacturer’s recommendations on maintenance. Some machines require a more complete inspection annually, or every few months, to make sure they are performing optimally.

Repair, Replace, or Refurbish?

If you notice your equipment is not as reliable as it once was, you have three choices: repair it, refurbish it, or replace it.

Older pieces of equipment may still have some life in them, and refurbishing might be the answer. To refurbish your laboratory equipment:

  • Dismantle the entire piece of equipment
  • Deep clean each individual piece
  • Polish or lubricate moving parts
  • Replace parts that are showing sign of wear

If your equipment is still not functioning properly, you will need to send it out for a professional repair or have someone come to your location to fix it.

If the equipment is past its lifespan and is no longer reliable, replacing it is the best option. Luckily, used laboratory equipment is available, saving money on replacement costs. In addition, companies like BaneBio will buy your equipment or use it as a trade-in on newer equipment.

This checklist is not an exhaustive list of all your research laboratory equipment maintenance and repair issues, but it’s a good jumping off point for getting started on your own program.

BaneBio is available for repairs, relocations, sales, services, assembly, and purchases of laboratory equipment. Have a question? Contact us today to see how we can help you!

Posted on

Laboratory Pack-up & Relocation, Part 2 | Lab Relocation Timeline

female lab researcher using microscope
When it’s time to relocate your laboratory, careful planning long before the actual move date will make the difference between success and disaster. See last month’s blog for a timeline of exactly what should be done and when, but for a view from 30,000 feet of the process complete with best practices, see below:

Who’s On the Team?

Choose who you want to be involved with the move. Utilize key employees to act as “move captains” but take care to involve all staff in the process. As your timeline emerges, meet regularly with your internal team to keep everyone informed and to address issues as they arise.

Cold Storage Transport

Maintaining the integrity of your research during the move means paying attention to every detail. If you have samples or substances that require storage at exact temperature ranges and requirements, keep appropriate cold-storage transport procedures in place. Be sure to identify a backup freezer in case of emergency and make sure to have dry ice on hand the day of the move.

Hire Specialists

Most laboratory equipment is sensitive and fragile, requiring expensive re-calibrations even when you move them from one bench to the other. It’s falsely economical to trust that equipment to a cut-rate moving company, hoping against hope that they won’t damage it. Spending the money to get a qualified moving company that you can trust to move your sensitive equipment will save you a lot of money and countless staff hours in the long run.

Preserve Chain of Custody

If your lab handles evidence for law enforcement agencies or other items that need chain-of-custody documentation, be particularly careful. While expensive upfront, it may turn out to be more economical and safer in the long term to arrange an escort who can maintain the chain of custody for certain items during relocation.

Hazardous Materials

It’s not unusual for a lab to contain items that have been classified as hazardous materials by the Department of Transportation. Consult authorities to get information about the legal and safety implications of transporting any type of hazardous materials. You will need to take steps to ensure the public’s safety when transporting potentially dangerous items.

Live Animals

Live animals need food and water—a unique consideration when transporting them during a lab relocation. Hanging water bottles is a solution to keep animals hydrated, but they frequently leak during transportation—soaking the animals’ bedding and leading to hypothermia or even death. If the animals in your lab are part of an experiment, they will require chain-of-custody documentation or other provisions to ensure the integrity of scientific research.

Avoid Cross-Contamination

Because cross-contamination can negatively affect the outcome of your research for years into the future, be especially careful to ensure that no items become cross-contaminated during your lab relocation.

Calibration Considerations

Confirm with your contacts at your instrumentation companies to see if your arrangement with them includes post-move calibration, even if they are not involved in packing, moving, and unpacking the instruments. Are you still indemnified even if you use a separate moving company? Ask how that process will affect your warranty.

Plan Your Route

Walk through your intended route with a tape measure and the measurements of everything that will be moved during your lab relocation. Will everything fit through doorways? If not, you will need to map out an alternate route—better to do that in advance than while the clock is ticking on moving day.

Record Specifications

Documenting the weight, dimensions, electrical connections, temperature, and humidity requirements of each item being moved will save you money. For example, you will want to know in advance if your new table is going to hold pieces of heavy new equipment before you move into the new lab. Figuring that out on the day of the move will be an expensive, time-consuming problem you don’t need.

Inform Everyone

Your team of researchers is likely data-driven like most efficient scientists. Be sure you communicate fully with them so they can plan for exactly when their equipment will no longer be available. Make sure you are aware of how long each piece of equipment will take to move and place back in operation. The facilities managers—both in the building you are vacating and the one you’re moving into—also need to be kept up to date. Keep them in the loop so they can oversee utilities connections and disconnections, provide adequate staging areas for packing crates, and make loading docks available when needed.

Understand and Comply.

Is your lab governed by GLP or GMP guidelines? Address if and how you will need to comply with federal and state regulations long before move-in day, so you can obtain needed documentation.

Any lab relocation, no matter how big or small, can be a stressful experience for everyone involved. Taking the time to plan and develop a roadmap in advance will help keep the process on the rails.

Posted on

Laboratory Pack-up & Relocation – Everything You Need To Know, Part 1

technician working in lab

When It’s Time to Move Your Lab

There’s no getting around it: moving a laboratory is a complex process that involves meticulous attention to detail, making it a stressful experience for all concerned. The actual move date will likely be preceded by 4–6 months of careful planning, even if you follow most lab managers’ recommendation that you hire an experienced lab relocation specialist. Outsourcing the project to a lab relocation specialist will minimize the move’s impact on your operation’s scientific mission and productivity.

Moving usually signals that new and exciting opportunities are ahead for a company, but it’s still critically important to plan correctly and take into account all aspects of the experience. For example, although it is important to plan out the logistics of the physical move, it is also important to take into account its emotional impact. A relocation is not only disruptive to the physical plant, but the introduction of a lab relocation specialist will change the dynamics of the organization. A good lab relocation manager will take the time to establish trust and respect with your entire team, and foster productive, collaborative relationships between his move team and your technicians, administrative personnel, and lab leads.

Make keeping everyone informed a top priority. So they can plan accordingly, your team will want to know not just the date for the move itself, but also when the equipment they use will no longer be available. Remember to talk to the facilities manager in the building you are vacating and your contact in the building you are moving into as soon as possible. These individuals will oversee everything from the disconnection and connection of your utilities to the availability of packing/unpacking areas and loading docks.

Every lab relocation is different with different priorities and steps needed to ensure a smooth and seamless transition. However, establishing a timeline is will help keep the process on track:

Two to Three Months Before the Move

  • Tour existing and new lab space with your lab transition planner and your architect.
  • Develop equipment binders and review responsibility matrix.
  • Dispose of old files, old chemicals, and old samples.
  • Notify vendors, the mail room, and other relevant parties that the lab has relocated.
  • Secure keys and access to the new space.
  • Identify who will pack the equipment and move it.
  • Set a start date and time-frame.
  • Establish a timeline to shut down certain pieces to prepare for move.
  • Send out RFP for specialist movers (chemical, equipment).

Two to Three Weeks Before the Move

  • Have boxes, tags, and other materials delivered to the lab so that packing can begin
  • Begin labeling each piece of equipment with a separate label that includes the name of the lab, the phase of the move in which it should be handled, and where it should be placed in the new lab.
  • Tour the new space to ensure connections are compatible with incoming equipment.
  • Identify move route for key equipment, checking door and height/weight clearances.

Day of the Move

  • Chemical movers pack up the chemicals in special containers.
  • General movers pack items not already packed.
  • Freezers are placed on the truck last so they can be unpacked first, positioned and plugged in.

Post-Move Follow Up

  • Tour the vacated lab to ensure all items have been moved.
  • Coordinate the calibration of equipment.

We can’t stress enough how important it is to have a lab relocation specialist working with you to ensure a smooth and trouble-free transition and restart. Using spreadsheets, templates, checklists and other tools, a good lab relocation specialist will create a lab transition plan that will make this complex process as clear, straightforward and incident-free as possible.

Posted on

Emerging Biotechnology Trends in 2021

scientist working in research lab
The biotechnology industry is constantly being shaped by new technological breakthroughs and advancements in knowledge. As public interest increases and more funding is granted, the following topics are emerging as biotechnology trends to watch in 2021.

Vaccine Development

The search for a COVID-19 vaccine has caused the life sciences community to reinvent the way it develops vaccines. For the first time, biopharmaceutical companies and government agencies forged strategic partnerships to accelerate the process of vaccine research and development.

For example, Moderna’s recently released COVID-19 vaccine is based on decades of previous, industry-wide research on how cells translate mRNA into proteins that fight disease. Access to this research and its evidence-based findings allowed Moderna to create its vaccine from the novel coronavirus itself, rather than using a weaker version of the attenuated virus, to elicit an immune response.

Because mRNA-based vaccines can be quickly moved through the phases of testing, Moderna was able to deliver more than one billion doses of the vaccine by early 2021. The research and development process behind the COVID-related vaccines has already provided valuable information about how to create more effective vaccines in the future.

Monoclonal Antibodies

Although monoclonal antibodies were first identified by research scientists years ago, they have recently been modified to create ADCs—Antibody-Drug Conjugates, with the ability to identify cancer cells and deliver targeted radiation more efficiently to these areas. Research conducted in 2021 will likely focus on additional ways to combine these lab-grown antibodies with drugs, creating new ways of managing conditions that currently require expensive medication or lack effective treatments.

Biosimilars

Another important ingredient in the field of biotechnology are the so-called biosimilars. Like monoclonal antibodies, scientists have been aware of biosimilars for some time; however, further research in 2021 is expected to focus on their modification to meet emerging medical needs. Because creating a biological drug made up of living organisms can be expensive and complex, scientists rely on biosimilars to simplify the process. By using different compositions that vary only slightly from existing drug brands, biosimilars can deliver the same results as current immunotherapy and targeted therapy drugs at a lower cost.

Cell and Gene Therapies

Customized medicine is one of the hottest trends in biotechnology. Cell and gene therapies, along with customized drugs, are used to treat the precise variant of an illness. They are created by manipulating human cells and genomes.

Kymriah, the first gene therapy approved by the FDA in 2017, uses a patient’s own white blood cells to treat acute lymphatic leukemia. Yescarta, another gene therapy approved in 2017, has resulted in remission for 72 percent of patients with non-Hodgkins lymphoma enrolled in clinical trials.

Over the past four years, the development of cell and gene therapies have doubled in growth. Starting in 2021, industry experts anticipate steady growth in the area of cell and gene therapies as companies continue to respond to increased public interest and demand. In fact, the FDA expects to confer 10 to 20 approvals annually related to gene therapy and cell-therapies in 2021 and beyond.

These four emerging trends for 2021 are important because they remind people of the critical role that biotechnology plays in developing new medicines, guiding healthcare, best practices, and supporting the health and well-being of people all over the world.

Posted on

Top Life Sciences Industry Trends To Watch For in 2021

blue dna

The life sciences industry is the umbrella term for companies, businesses, and research institutions dedicated to improving protection and improvement of human, animal, and natural life. It includes cell biology, biophysics, environmental sciences, biomedicine, pharmaceuticals, biotechnology, nutraceuticals, neuroscience, and countless others. As you might imagine, this is a frontier that moves rapidly, constantly driven by change and technological advancements.

Looking ahead to 2021 indicates that the following trends will play a key role in shaping the life sciences industry:

Personalized medicine through advancements in genetics

As researchers continue to discover the genetic coding component of some conditions, the possibilities for personalizing medicine and healthcare procedures based on each person’s particular DNA information or other genome features become greater and more exciting.

Collaborative Innovation of Various Life Sciences Companies

In May of 2019, Arzeda, Twist Bioscience, Labcyte, and TeselaGen joined forces to create a state-of-the-art assembly platform for the DNA molecule. This is just one example of how highly collaborative the life sciences industry is, and what the possibilities are when health science organizations work together to push the boundaries of research and development.

Advancement of Drug Research

Smart technology will allow for better integration of data from assessment devices such as patient monitors, laboratory equipment, and MRI scans to more accurately prescribe medication for patients for more objective, evidence-based results.

Increased Volume of Life Sciences Research

In the field of precision surgery, studies connecting robotics to improve surgical methods are on the rise. Artificial intelligence can provide doctors insight in the most accurate treatment plans and which procedures will result in the best outcomes.

Increased Digitized Assessment, Diagnosis, and Treatment of Patients

Digital transformation has paved a way for better consumer access and improved marketing strategies for companies. The life sciences industry is expected to see an increase of digitalization through online assessment, diagnosis, and treatment of patients in 2021.

Value-based Pricing of Products

As more laws are being passed to drive down the prices of products especially in the pharmaceutical and nutraceutical industries, more companies will continue to work hard to demonstrate a drug’s effectiveness so that consumers can see the true value of the product. This can help drive down the cost of medications while providing evidence-based information for people to whom the drug’s efficacy matters most.

Data Management and Integration

Continued innovation of and improvements to cloud management strategies will enable data analysts to more easily gather, organize, and interpret information that is pertinent for life sciences research and system operations.

Incorporation of Genetics in Treatment

Expect more integration of genetic information into the assessment and treatment of disorders. In time, gene technology will make it possible for researchers to identify genome sequences that can predict disorders in humans and animals.

Heightened Focus on Immune Cell Function

A better understanding of immunity will inform how diseases and viruses are spread—especially important in light of the recent pandemic. Researchers are interested in certain attributes of cells demonstrated to be immune to certain types of viruses and bacteria. These studies will bring about profound implications in the field of immunotherapy.

Trends that are expected to affect the life sciences industry in 2021 are exciting and ever changing. Countries including the United States have increased funding in the research areas of science, technology, and healthcare, demonstrating the world’s commitment to innovations within the life sciences industry. Continued innovation and advancement will improve the welfare of those of us who are living today, as well as those for generations to come.

Posted on

Laboratory Relocation Tips For Success

cold storage units and researcher in lab
Whether you’re renovating, consolidating, decommissioning, or expanding your laboratory into a brand new space, use a detailed transition plan to ensure a smooth move and protect your projects. After all, the stakes are high– and missteps have the potential to cause more than temporary inconvenience – so be sure to pay close attention to every detail.

The process can be so complex that some labs hire “transition planners.” Using a set of proprietary templates, checklists, and work plans, these professional planners forecast a timeline for the entire transition, day by day, complete with all the decisions and activities that will need to be made. If you’re anticipating a lab relocation, consider whether or not to hire a transition planner in light of the following points:

Expertise.

Believe it or not, some laboratory transitions take up to six months of planning before a single piece of equipment is moved. With that level of detail to consider, even if you feel you have the resources in-house, you may want to hire an experienced professional planner dedicated to this one task only. This will allow your research staff to continue working on their projects virtually uninterrupted, while your transition planner manages the logistics of the upcoming move.

Experience.

It bears repeating because it’s the most critical thing to account for when managing a laboratory relocation: maintaining the integrity of ongoing research is the most important aspect of any transition. This means your transition planner needs to fully understand the environment your lab is moving into. Where will each piece of equipment be located? Is the proper electrical, mechanical, and plumbing infrastructure in place? If you deal in live specimens, what sort of climate and humidity controls need to be implemented?

The following 10 best practices are highly recommended when transitioning your lab:

Choose Your Internal Team.

It’s likely everyone will play a role, but selecting key people to act as team captains will help keep things on the rails. At your first meeting, identify important dates and a project timeline that you can share with the rest of the staff. Set up regular meetings with your core team so everyone stays informed and any emerging issues can be nipped in the bud before they become problems.

Find a Qualified Equipment Mover.

Don’t rely on regular home or business moving companies to handle your sensitive lab equipment. We don’t have to tell you that these items are delicate and easy to damage. Spend the money and hire someone who specializes in moving lab equipment– the extra investment is well worth it.

Monitor Calibration of Instrumentation.

Talk to your vendors/service contractors to determine under what conditions they will calibrate your equipment after your move. Will they recalibrate or re-certify instrumentation after the move, or does your Agreement with them require that they crate, pack, move and uncrate the equipment in order to maintain your indemnification and guarantee?

Determine Cold Storage Needs.

A regular freezer truck probably isn’t going to do it if you are moving items that require cold storage. Any laboratories contain items, samples, or substances that must be kept in cold storage. Factor in the exact temperature ranges and requirements that the items involved in your research require. Have a back-up freezer on hand the day of the move. Dry ice is also a good idea “just in case.” T

Observe the Chain of Custody.

Do you handle evidence for law-enforcement agencies? Pay particular attention to documenting any chain-of-custody considerations during transport.

Special Permits for Hazardous Materials.

Chances are your lab uses items classified by the Department of Transportation (DOT) as hazardous. Make sure you’re adhering to any legal requirements as well as safety concerns while in transit.

Avoid Cross-Contamination.

Your lab’s reputation is on the line. Take every step to ensure that the outcome of your future research is scientifically valid by being accurate and thorough with every item in your lab. Live animals are a special consideration.

Comply with GMP Requirements.

The need to meet regulatory compliance requirements (especially GLP/GMP guidelines) both before and after relocation– is essential. You will need to fill out and file all the appropriate documentation, which can be extensive– so be sure you do your due diligence very early in the lab relocation process.

Plan Your Route.

You may find that doorways and corridors are not large enough to accommodate bulky lab equipment. Measure equipment and consider your route carefully– find alternatives if you have an issue.

Anticipate Your Needs.

Replacing the benches at your new lab? Make sure they look more than look great. If they won’t bear the weight of tabletop equipment, you’ll have big problems on your hands. How about electric outlets and cord lengths? Again, these issues are easy to address in advance, but very inconvenient the day-of.

The most important thing to remember is that laboratory relocation is never routine. The process is complex and the stakes are high. So whether you hire a transition planner, appoint someone from inside your organization, or take the job on yourself, pay careful attention to the details by using these suggested best practices as your guide!

Posted on

What You Need To Know Before Moving Your Laboratory

scientist working in a lab
Relocating your lab safely and efficiently can be complicated, time-consuming, and labor intensive. You may be aware of the obvious things that need to be done, like packing and labeling chemicals and other items on the shelves, transporting them safely to their new location, and decontaminating everything thoroughly when you’re down to the bare walls.

However, you should be aware of a few less obvious things. You need to be performing all these tasks according to the compliance and regulatory issues from the EPA, OSHA, DOT, IATA, and any other regulatory bodies that pertain to your laboratory relocation.

Therein lies the $64,000 question: which regulatory guidelines apply to you based on the size of your lab, the work you do, and multiple other factors? In some circumstances, ignoring any required steps could cause employee injury or property damage, and result in thousands of dollars in fines…but not all circumstances. To make it clear to you which regulations and compliance measures apply to the relocation of your lab, and to ensure a safe relocation of your lab according to all the pertinent compliance measures and regulations, it makes sense to reach out to your local regulatory bodies to ask what’s expected of you during your move. Hiring an experienced partner like BaneBio to consult on the logistics of the project could prove to be one of the most helpful things you can do to save time while keeping the project compliant.

Financial Management

Depending on the size and distance of the move, lab relocations can be costly. Rather than hiring a different contractor for each step, a good way to cut costs safely is by hiring one contractor to go through the entire process with you. This will improve the efficiency of the project and decrease the overall price.

Hiring and Team Management

Your logistics consultant will help you assemble the appropriate relocation team based on the size and particulars of your lab. You may need to assemble a team made up of experts in all aspects of a lab relocation that represent key internal and external stakeholders, including team leaders, environmental consultants, project managers, and supply chain vendors.You may not need a team like this, but your logistics consultant can help you determine an alternate way to stay organized and on track during your relocation.

Waste Disposal

Rely on the knowledge of either on-site team members or logistical consultants who have a deep knowledge of hazardous waste disposal. To reduce liability, you will want to dispose of unnecessary hazmat rather than transport it. Assess all chemicals prior to transportation, and dispose of any that will not be used at the new facility.

Hazmat Transportation

Despite your best efforts, it is likely that some hazmat will need to be transported during a lab relocation. If your logistics consultant advises, be sure to adequately pack, label, and transport hazmat all within PHMSA regulations.

Lab Decontamination

It is standard practice to decontaminate the facility you are vacating according to ANSI guidelines. Again, your logistics consultant can advise you on appropriate decommissioning methodology based on the work you have been doing.

Sampling and Reporting

Once again, if advised by your logistics consultant, qualify and document the decontamination of the lab you are vacating through sampling and reporting using real time sampling as well as laboratory analysis. Summarize the decontamination methodology, activities, and sampling results into a report that your company can use to demonstrate and quantify your decontamination efforts.

Considering a lab relocation? Unsure which compliance guidelines and regulations apply to you? BaneBio can help!

Posted on

Choosing the Right Incubator for Your Lab

The CO2 incubator is a critical piece of lab equipment designed to create and reliably maintain a sterile, pH-optimized, humidified, in vitro environment for the culture of living tissues or cells. 

There are two main types of incubators: direct heat and water jacket. In order to determine which type of incubator best suits your needs, it’s important to review and evaluate the advantages and drawbacks of each. Because different cell types respond differently to temperature fluctuations, hypoxia, and vibrations, it is also critical to review your choices of incubator in light of which types of cells you plan to incubate, and where you plan to place the incubator within your lab. 

Once you have determined the ideal living conditions for your cells, and where the incubator will be placed within your lab, use the five considerations below to choose the right incubator for your needs:  

Know the advantages and drawbacks of direct heat vs. water jacket incubators.
A water jacket incubator has a water-filled layer, or “jacket”, surrounding the growth chamber. The water within the jacket circulates, creating a relatively uniform interior temperature and thermal buffer against outside air fluctuations. Because water jacket incubators can hold heat up to five times longer than direct heat units, they are especially advantageous in the event of a power outage. A water jacket also reduces vibrations, which is valuable when you are working with sensitive cells. 

Keep in mind, however, that water jacket incubators are very heavy when filled, and can take up to 24 hours to reach a stable operating temperature. Also, because they are not designed to operate at temperatures high enough to sterilize or decontaminate, gas decontamination may be required.

Like water jacket units, direct heat incubators also heat the inner chamber through conduction; however the inner walls of the unit have direct contact with heating coils instead of the water jacket. This results in more rapid temperature changes. Rather than the 24 hours a water-jacket unit takes to reach required temperature, setup of a direct heat incubator takes only eight hours. Its heating coils can also reach temperatures to sufficiently sterilize and decontaminate. 

On the other hand, because the direct heat incubator’s heating coils have very specific contact points on the inner walls, the inner chambers of this type of incubator are less uniformly heated and are more susceptible to changing ambient air temperature and temperature fluctuations. When temperature stability is critical, a water jacket incubator may be more suitable for your needs.

Determine where within the lab the incubator will be located.
Because the environment that surrounds the incubator affects the way it functions, determining where the unit will be located is important before you make a decision. A water jacket incubator works best in a “hot spot” or if the ambient temperature of the lab changes frequently. The water conduction system is significantly more resistant to external temperature changes than are the coils of a direct heat incubator. If the incubator is to be placed near equipment that vibrates heavily such as a centrifuge, a water jacket unit will minimize this movement. 

Assess the humidity controls of the incubator.
The ability to maintain the ideal humidity within the incubator is critical because it prevents evaporation from the cell culture. When water evaporates from the media, the concentration of amino acids, salts, and metabolites spikes, causing osmotic pressure to rise and subsequent damage to cells. Regulating the amount and type of airflow that occurs within the chamber also affects the rate of evaporation. Some incubators have introduced systems to slow the airflow to minimize evaporation and avoid drying out cell cultures. When comparing incubators based on this feature, look for the number of air exchanges over time within the inner chamber.

Decide if hypoxic control is necessary and determine accuracy of gas sensors.
Preserving a healthy level of carbon dioxide within an incubator is important because the interaction of CO2 with the cell culture media determines the media’s pH. Many incubators use conventional thermal conductivity (TC) sensors, but newer models rely on a type of infrared (IR) sensor that is less sensitive to chamber humidity and temperature. 

Oxygen levels can also have drastic effects on the growth of some cultures such as stem cells or primary tissues. An incubator with O2 controls uses nitrogen gas to lower the concentration of O2 within the growth chamber. Evaluating the need in your lab for this type of gas control measure is an important consideration when purchasing an incubator.

Consider options for constant contamination control.
Contaminants can be entered into the incubator simply by opening the door. When an incubator is maintained with positive pressure within the growth chamber, airflow into the chamber is minimized—preventing airborne contamination. Internal air is then forced through a HEPA filter to provide an extra layer of sterilization. 

Note that a HEPA filter installed inside the growth chamber can be problematic, especially if the blower’s motor stops, causing contaminants from the filter to fall on your cultures. Consider an externally mounted HEPA filter for easier service and repair, and to protect cells from potential contaminants. If sterility of cultures is a top priority, be especially mindful of an incubator’s contamination controls prior to purchase. 

A well-designed, properly functioning laboratory often includes incubators to keep cells growing well and protected from contaminants. Taking the time to assess your needs in light of these five considerations will help you make an appropriate choice.