Posted on

How to Buy Used Lab Equipment Without Regret

A decorative image of a large lab space with used lab equipment

When budget constraints are tight and lead times on new instruments stretch into months, the case for pre-owned equipment is hard to argue with. The cost savings can be significant, availability is typically faster, and the pre-owned market is often the only place to find legacy instruments that have been discontinued but remain essential to a specific workflow. For many lab managers and procurement teams, the decision to buy used lab equipment is a smart allocation of limited resources.

The hesitation is understandable, though. Unlike purchasing new, you don’t always know the full story behind a piece of equipment. But the risk is manageable, provided you know what to look for.

This is the buyer-side companion to our recent guide on how to consign, trade, or sell lab equipment. Where that piece covered how to properly sell used lab equipment online, this one gives buyers a clear checklist for evaluating pre-owned instruments with confidence, as well as what questions to ask before committing to a purchase.

Understand Condition Grading Before You Shop

“Used” is a blanket statement that doesn’t tell the full story. It’s just a starting point. Vendors use terms like refurbished, certified pre-owned, and as-is to describe different things, and the gap between them can mean the difference between an instrument that’s ready to run on day one and one that requires immediate servicing before it’s functional.

Here are the common grades you’ll encounter when you set out to buy used lab equipment:

  • Refurbished: Inspected, repaired to manufacturer specifications, and tested for full functionality. Often includes new or reconditioned components.
  • Certified Pre-Owned: Similar to refurbished, but typically implies a documented inspection process and may include a warranty. Ask what the certification covers.
  • As-Is: Sold in its current condition with no testing, repair, or guarantee of functionality. Risk is entirely on the buyer.
  • Cosmetic Grade: Functionally tested but may show signs of wear. Common in equipment where physical condition doesn’t affect performance.

“Always ask the vendor to define their grading standards in writing before assuming you know what you’re getting.”

Verify the Service and Maintenance History

A documented preventive maintenance history is one of the clearest indicators of a well-cared-for instrument. When you buy used lab equipment with full service records, you know what’s been done, when it was done, and what components have been replaced.

When evaluating a piece of equipment, request:

  • Service logs and PM records
  • Repair history, including any major component replacements
  • Documentation of any known issues and how they were resolved
  • The decommissioning reason, if the instrument came from a lab closure

High-cycle instruments like centrifuges, PCR thermocyclers, and shakers accumulate wear in ways that lower-use items don’t. A centrifuge with 50,000 cycles and no PM documentation is a different purchase than one with the same cycle count and a complete service history.

Confirm Calibration Status and Documentation

Calibration documentation is non-negotiable. It affects data integrity, and out-of-spec instruments produce out-of-spec results.

Before you finalize any decision to buy used lab equipment, ask the following:

  • When was the instrument last calibrated, and by whom?
  • Is the calibration certificate transferable, or was it issued to the original lab?
  • Does the unit come with supporting calibration documentation?
  • Will the instrument require re-calibration upon installation at your facility?

A Note on Re-Calibration

Even a fully calibrated instrument may require re-calibration after transport and reinstallation. Factor this into your budget and timeline, especially for analytical instruments where baseline accuracy is critical.

Test Before You Commit (or Confirm the Return Policy)

When possible, strive for the ideal scenario: The instrument is powered on, demonstrated, and put through its paces before the transaction closes. If you’re purchasing locally or the vendor can arrange a demonstration, insist on it. There’s no substitute for watching an instrument run.

When in-person testing isn’t possible, the purchase terms need to compensate for that gap. Look for:

  • A functional testing certification from the vendor’s in-house technicians
  • A clearly defined return window 
  • Warranty terms that specify what’s covered and for how long
  • Confirmation that the unit powers on and passes operational testing

“Vague language around condition and no defined return policy are red flags.”

If a vendor can’t tell you with confidence whether a unit powers on and functions as intended, that uncertainty will become your problem after the sale.

Watch for These Red Flags

Knowing where to buy used lab equipment online means knowing how to spot listings that carry more risk than they’re worth. The following are consistent warning signs across vendors, auction platforms, and resellers:

  • “Sold as-is, no returns” with no supporting documentation. This combination removes all accountability from the seller and transfers all risk to the buyer.
  • Missing accessories, probes, rotors, or software. An instrument that’s non-functional out of the box because key components are absent can be more expensive to complete than buying new.
  • No information on equipment origin. A unit sourced from an auction lot and one decommissioned from a known research lab carry different risk profiles.
  • Pricing that seems too good to be true. This usually means something has been left out of the description on purpose.

Buy From a Vendor Who Services What They Sell

There’s a difference between a dealer who inspects, tests, and services equipment in-house and one who simply resells auction lots. The first category has technical accountability built into their process; the second is passing on someone else’s unknown quantity.

When evaluating where to buy used lab equipment, look for vendors who offer:

  • In-house technical staff who perform the inspections and repairs themselves
  • Documented service processes and post-sale support
  • Warranty options that reflect confidence in the equipment they’re selling
  • Preventive maintenance plans that extend the equipment’s working life after purchase

BaneBio inspects, refurbishes, and services every instrument before it leaves our facility. Every piece of pre-owned equipment comes with a standard 14-day warranty, and our Preventive Maintenance Service Plans are designed to keep your equipment running reliably long after the purchase is made.

Browse our current pre-owned lab equipment inventory or reach out to the BaneBio team to discuss what you’re looking for. We’re here to help you find equipment that works now and well into the future.

As a used lab equipment vendor that cares about the quality of everything we sell, we’re happy to ensure your purchase is one you won’t regret. Reach out with any questions today!

Posted on

Auto Defrost vs. Manual Defrost Freezers: Which Is Right for Your Lab?

A scientist removing an item from a lab freezer

You open your lab freezer after a scheduled defrost cycle and notice the temperature log shows a two-hour excursion above your acceptable threshold. Downstream, that means a rack of irreplaceable biological samples that may now be compromised, and a lot of difficult conversations ahead.

Defrost type is rarely the first thing labs think about when sourcing a lab freezer, but it should be. Whether you’re storing enzymes, vaccines, cell lines, or reagents, the way your unit manages frost accumulation has direct consequences for sample integrity, workflow, and maintenance burden.

The good news: Both auto and manual defrost systems are used successfully in professional lab settings every day. Neither is universally superior. The right answer depends entirely on what’s inside the unit, how your lab operates, and what level of maintenance your team can support.

How do these systems work? What is a manual defrost freezer? What is an auto defrost freezer? The answers are all below.

How Each System Works

Before you can make the right call, it helps to understand what’s happening inside each type of unit.

Manual Defrost

  • Refrigerant circulates through coils embedded in the cabinet walls.
  • There are no fans or forced air movement.
  • Frost accumulates on wall coils over time.
  • The unit must be taken offline periodically for manual defrost.

Auto Defrost (Forced Air)

  • Evaporator coils sit in an enclosed ceiling housing.
  • Fans circulate cold air throughout the cabinet.
  • A heating element briefly warms the coils on a timed cycle.
  • No manual intervention is required.

Here’s a side-by-side comparison of the core differences:

Feature Manual Defrost Auto Defrost
Air circulation Passive (none) Forced air (fans)
Frost management Periodic manual removal Automated heating cycles
Temperature uniformity Stratified; warmer near top More uniform throughout
Sample desiccation risk Low Higher with open containers
Maintenance labor Required every 3–6 months Minimal ongoing labor
Common  Deep freeze (−20°C and below), sensitive biologics Fridge range (4°C), high-throughput labs

What Is a Manual Defrost Freezer?

A manual defrost freezer, sometimes called a “cold wall” freezer, relies entirely on refrigerant-cooled cabinet walls to maintain temperature. There are no fans or active air movement. Frost builds up on the interior walls over time and must be cleared by taking the unit offline, removing samples to temporary storage, and allowing the ice to thaw. It’s more labor-intensive, but that passivity is part of what makes it well-suited for sensitive storage applications.

What Is an Auto Defrost Freezer?

An auto defrost freezer (also called a “no-frost” or “forced-air” freezer) uses a fan-driven evaporator system combined with a periodic heating cycle to prevent frost from accumulating. The defrost cycles happen automatically, typically on a timer, and don’t require any action from lab staff. This convenience comes with trade-offs that matter more in some storage contexts than others.

The Temperature Stability Question

Temperature stability is the first concern most lab managers raise. The conventional wisdom has been that auto defrost causes dangerous temperature swings. Like most generalizations, this one is partly right and partly outdated.

“Neither defrost system is automatically safer. The quality of the unit and the sensitivity of the samples both matter far more than the defrost type alone.”

Here’s what the data shows: on a quality lab-grade auto defrost unit, sample temperature rise during a defrost cycle is typically minimal, often in the range of 1 to 2°C. That’s a far cry from the dramatic excursions people fear. The reputation largely comes from consumer-grade equipment and older auto defrost units that lacked the insulation, control systems, and cycle management that modern lab-grade units offer.

That said, manual defrost units aren’t immune to temperature events either. Routine door openings introduce warm ambient air, and without forced air circulation to aid recovery, a lab freezer with passive cooling can take significantly longer to return to set-point temperature.

  • Auto defrost concern: Heating cycles introduce periodic temperature fluctuations. In older or consumer-grade units, these can be significant. In modern lab-grade auto defrost equipment, they are typically minimal.
  • Manual defrost concern: Passive cooling means slow recovery after door openings. Warm air enters and the unit lacks the airflow to push it back out quickly.
  • The real question: Which type of temperature event is more likely to affect your specific samples, and which unit’s design will best mitigate it?

Industry data on recovery time comparisons between defrost types consistently reinforces the same takeaway: unit quality and alarm-response systems matter more than defrost type. If your lab doesn’t have a temperature monitoring system and alarm protocol in place that’s a more urgent concern, regardless of which lab refrigerator freezer you’re running.

Choosing by What You Store

Defrost type should be determined by what you’re storing and how you need to store it:

  • Highly sensitive biologics, enzymes, and irreplaceable samples: Manual defrost is the traditional choice and still strongly preferred. Temperature stability is paramount, and the periodic disruption of defrosting is manageable with proper planning. A manual defrost freezer like the VWR MFV-30 is a workhorse in this category for good reason.
  • Vaccines and general reagents at fridge temperature: Either system can work well if the unit is lab-grade. Prioritize alarm systems and temperature logging over defrost type here.
  • Open-container storage or loosely covered samples: Manual defrost is strongly preferred. Air circulation from forced-air systems can desiccate samples stored in open or loosely covered containers over time, a risk that doesn’t exist in a passive cooling environment.
  • High-throughput labs with frequent door openings: Auto defrost may perform better in this situation. Forced air circulation helps the cabinet recover temperature faster after each door-open event, which means cumulative temperature exposure is often lower than it would be with a slow-recovering passive unit.
  • Lab refrigerators at 4°C: Auto defrost is widely accepted at refrigerator temperatures, and units like the Thermo Scientific TSX2305SA are common in this role. The physics of frost formation at 4°C are less aggressive, and the convenience advantage of auto defrost is harder to argue against.
  • Lab freezers at −20°C and below for critical samples: Manual defrost has stronger historical support at deep freeze temperatures. Modern lab-grade auto defrost freezer units narrow that gap considerably, but for truly irreplaceable samples, manual defrost remains the conservative choice.

Maintenance Considerations

Manual Defrost

Expect to take the unit offline for defrosting every 3 to 6 months, depending on usage frequency, ambient humidity, and how often the door is opened. Each defrost event means temporarily relocating samples to backup storage, which itself carries temperature risk if not planned carefully. Labs running manual defrost units should document a defrost schedule, designate backup storage capacity, and ideally have dry ice or a spare unit on standby.

Auto Defrost

No manual intervention is needed. The trade-off is trusting the defrost cycle mechanism to function correctly over time. If the heating element or cycling timer fails, frost can accumulate undetected until it begins affecting temperature performance. Routine preventative maintenance checks from a qualified service technician help catch these issues before they become sample-loss events.

Pro Tip: How Often to Manual Defrost a Freezer

Most manufacturers recommend defrosting when frost buildup reaches approximately a quarter of an inch on the interior walls. At a minimum, it should occur every 3 to 6 months as a scheduled maintenance event. High-humidity environments and units with heavy door traffic will need more frequent attention. Never let frost accumulate past half an inch, as it begins to impair heat transfer efficiency and temperature uniformity.

Quick Reference: Which Should You Choose?

If you want to get straight to the answer for your best situation, here it is:

Storage Scenario Recommended Defrost Type
Sensitive biologics or enzymes Manual defrost
Open containers or loosely covered samples Manual defrost
Vaccines and general reagents (fridge temp) Either, if lab-grade
High-throughput lab, frequent door openings Auto defrost
Lab refrigerator (4°C) Auto defrost generally accepted
Lab freezer (−20°C or lower), critical samples Manual defrost preferred

The Bottom Line

Between the two options, the right choice is always the one that matches your samples, workflow, and capacity for maintenance.

What matters most is buying a lab-grade unit from a reputable manufacturer, pairing it with a temperature monitoring and alarm system, and having a documented protocol for both routine maintenance and emergency response. A well-managed manual defrost unit outperforms a poorly maintained auto defrost unit.

The safest choice is the one you can operate correctly.

Need a Manual or Auto Defrost Lab Freezer?

BaneBio carries quality-tested lab-grade refrigeration, backed by our standard 30-day warranty. Browse the refrigeration catalog or reach out to discuss your specific storage needs. We’re always happy to help you make your lab as effective and efficient as possible.

Posted on

How to Consign, Trade, or Sell Lab Equipment (Step-by-Step)

Decorative graphic that focuses on a microscope in the foreground

Upgrades happen. Grants run out. Research priorities shift. Whatever the reason, labs can accumulate equipment quickly. And suddenly you’re navigating a crowded storage room full of instruments that haven’t run a sample in years. You’re left with two options: Find a way to sell lab equipment you no longer use, or let it take up space and collect dust.

Startling statistic: At any given moment, billions of dollars in idle lab equipment sits unused in research institutions and biotech facilities in the U.S. alone.

There’s good news, though. You have multiple options. Sell it outright, trade it toward equipment you actually need, or consign it through an experienced laboratory equipment supplier. And when you work with BaneBio, all three paths are straightforward. This guide walks you through each option, step by step.

Know Your Options: Sell, Trade, or Consign

Not every situation calls for the same approach. Before you decide how to sell lab equipment, it helps to understand what each option we offer looks like in practice.

Sell Outright

This is the fastest path to cash, ideal for those taking a “see what you can get for it” approach. No longer need the equipment in any capacity? We purchase directly from you, so you receive payment once the deal is finalized. There’s no waiting, listing, or logistics headaches involved.

Trade

Sometimes you need to swap surplus equipment toward something your lab actually requires. Trade value is applied directly to instruments from BaneBio’s extensive inventory, significantly reducing your out-of-pocket cost on upgrades.

Consign

BaneBio lists and sells your equipment on your behalf. This is a strong option for high-value items and/or flexible timelines. You benefit from a win-win situation by taking advantage of our buyer network without having to manage the sale yourself.

Quick Comparison

Option Speed Your Effort Payout Type
Sell Fast Low Immediate cash
Trade Fast Low Equipment credit
Consign Variable Minimal Higher return potential

Step 1: Take Stock of What You Have

Before reaching out to us, do an inventory of your surplus. It doesn’t need to be exhaustive, but the more detail you can provide upfront the smoother the evaluation process will be.

For each item, there are some key notes you should take:

  • Make and model number
  • General condition (functional, powers on, cosmetic damage, etc.)
  • Accessories or components included (rotors, probes, software dongles, manuals)
  • Any known issues or missing parts

Pro Tip: Don’t assume something is too old or too niche to have value. BaneBio works with a broad buyer network and has customers for a wide range of equipment across dozens of instrument categories.

Step 2: Request a Quote from BaneBio

Once you have a sense of your inventory, submit your list on our website. The process is designed to be simple, with no obligation or pressure.

What to include in your submission:

  • Photos: clear images of the instrument, including serial number plates and any visible wear
  • Model numbers: found on the instrument itself or in original documentation
  • General condition: operational status, recent service history if available
  • Accessories included: list any rotors, probes, adapters, or software that comes with the instrument

After you submit, our team evaluates the equipment and responds with an offer or a set of options tailored to your situation. You’re under no obligation to proceed. This is simply a starting point for the conversation.

Step 3: Review Your Offer and Choose Your Path

Once we have assessed your equipment, we’ll walk you through your options, whether that means a direct purchase offer, trade credit toward used lab equipment for sale in our inventory, or a consignment arrangement.

As you evaluate the offer, consider:

  • Timeline: Do you need funds quickly, or is a longer consignment window acceptable?
  • Budget needs: Is cash the priority, or would trade credit toward an upgrade be better for your situation?
  • Reinvestment plans: Are you actively looking to replace or supplement existing instruments? Our inventory includes centrifuges, analytical equipment, environmental chambers, microscopes, PCR systems, and much more.

There’s no universal right answer, because every lab’s needs are unique. A lab shutting down a redundant workflow has different priorities than one funding an equipment upgrade through surplus sales. Our team can help you think through the trade-offs.

Step 4: Logistics Made Easy

One of the most underappreciated parts of deciding to sell lab equipment is what comes after the deal is agreed upon: getting the equipment out of your facility safely. This is where things can get complicated if you’re not working with a laboratory equipment supplier that handles logistics in-house.

The BaneBio Lab Logistics team manages the entire removal process:

  • Scheduled pickup coordinated around your facility’s availability
  • Professional packing and transport
  • Custom, scientific-packaging available for fragile, high-value, or oversized instruments
  • Experienced handling of large and complex equipment that standard couriers simply aren’t equipped for

Why Does This Matter?

Scientific instruments require careful decommissioning, proper packaging, and appropriate transport. Damage during removal or shipping can affect both the instrument’s value and your facility. Our Lab Logistics team is trained specifically for this kind of work.

Step 5: Get Paid (or Upgraded)

The final step looks a little different depending on which path you chose. Here’s what to expect once logistics are complete:

If You Sold

Payment is issued once the deal is finalized and the equipment is received. It’s a clean and straightforward process.

If You Traded

Your trade value is applied toward equipment from our inventory. You leave with instruments your lab can actually use, as well as a reduced out-of-pocket cost on the upgrade.

If You Consigned

We list and manage the sale for you, and payment is issued once your item sells. We’ll handle the transaction, buyer communication, and all related logistics. If you’re looking for used lab equipment for sale in the meantime, your trade credit can be applied here.

Special Situation: Full Lab Closures

If your lab is shutting down entirely, the situation changes significantly. Piecemeal selling is time-consuming and rarely maximizes recovery value. To properly handle an “everything must go” situation, expertise is needed.

We offer comprehensive Lab Closure services for this very scenario:

  • A single point of contact to assess, catalog, and value everything at once
  • Removal of all equipment, regardless of size
  • Buyer sourcing across our established network of customers
  • Significant reduction in administrative burden versus managing individual sales

For labs facing a full closure, working with a trusted laboratory equipment supplier that can handle the entire process is far less stressful. On top of that, it’s generally more financially productive than managing it independently.

A Stressless Way to Sell Lab Equipment

Whether you’re clearing out a single surplus instrument or winding down an entire facility, the decision to sell lab equipment doesn’t have to be complicated. Sell, trade, or consign. BaneBio makes all three options achievable, and our team handles the parts that would otherwise create friction: valuation, logistics, packaging, and buyer matching.

Labs that have worked with us consistently point to the same advantages: a broad and well-maintained inventory of used lab equipment for sale, professional service, and a team that understands scientific equipment.

Ready to Get Started?

If you have an equipment list ready, you can submit it here and our team will get to work evaluating it. Let’s let your equipment keep serving science.

Posted on

UV-Vis Spectrophotometer: The Basics Every Lab Technician Should Know

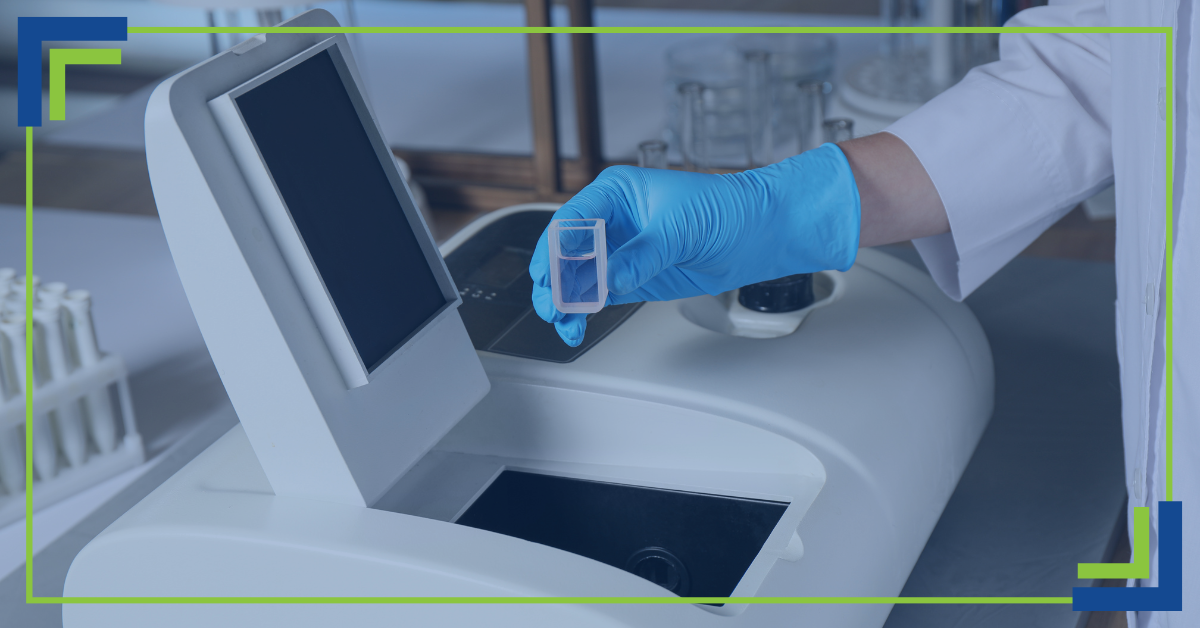
A scientist using a UV-Vis spectrophotometer

The UV-Vis spectrophotometer is one of the most widely used analytical tools in modern labs, and for good reason. It provides fast and accurate means of characterizing samples, confirming concentrations, and tracking reactions in real-time. Whether you’re working in pharmaceutical research, environmental testing, or biotech, this is an instrument your lab needs to have on hand.

This guide aims to cover everything you need to know about this versatile and essential laboratory tool.

What Is UV-Vis Spectrophotometry?

Before understanding the device itself, we need to understand the process it facilitates. UV-Vis spectrophotometry measures the amount of ultraviolet (UV) and visible light different substances absorb; different molecules absorb light at different wavelengths, and the degree of absorption at a given wavelength provides insights into the nature and quantity of a substance.

The process is governed by the Beer-Lambert Law, which states that absorbance is directly proportional to both the concentration of the absorbing material and the path-length of light through the sample. It’s expressed as:

A = εcl

Where:

  • A = absorbance
  • ε = molar absorptivity (a constant specific to the substance)
  • c = concentration
  • l = path-length

Understanding the process and the law that governs it is fundamental to interpreting the data your spectrophotometer generates.

Key Components of a UV-Vis Spectrophotometer

So how does a spectrophotometer work from a mechanical standpoint? Let’s take a look at its primary components and how they work together.

  • Light Source: For UV range, instruments use a deuterium lamp. For visible range, a tungsten-halogen lamp is utilized, though certain modern models integrate both into a single source. The light source provides the broad-spectrum beam needed to make the measurement.
  • Monochromator: This isolates wavelengths from the broad light source through a prism or diffraction grating. With this, only the desired wavelength (or narrow band of wavelengths) is directed toward the sample. 
  • Sample Holder (Cuvette): This is made from glass, disposable plastic, or quartz (for UV measurements). The cuvette is housed in a sample compartment that the selected wavelength passes through.
  • Detector: After passing through the sample, it is measured by a photodetector and converted to an electrical signal.
  • Data Display: The electrical signal is processed and displayed as one of three kinds of data: absorbance, transmittance, or concentration. Recent models integrate with software that allows the user to log data as well as perform spectral scanning, method storage, and report generation.

Common Laboratory Applications

What does a spectrophotometer measure in a real-world lab setting? Let’s take a look at its applications.

Measuring Sample Concentration

Technicians can determine the precise concentration of virtually any light-absorbing compound, from dyes and pigments to active pharmaceutical ingredients. This is one of the most routine uses of the instrument in quality control and R&D labs.

Monitoring Chemical Reactions

The UV-Vis spectrophotometer is an excellent tool for tracking reaction kinetics. Enzyme assays, for example, are frequently monitored this way in biochemistry labs.

Protein and DNA Quantification

Biological labs rely heavily on UV-Vis measurements for nucleic acid and protein analysis. According to a survey by the American Laboratory community, quantification of biomolecules remains one of the top five most common uses of UV-Vis spectrophotometry in life science research.

Environmental and Pharmaceutical Testing

Regulatory agencies require rigorous testing of water quality, pollutants, and pharmaceutical compounds. The UV-Vis spectrophotometer is a go-to instrument for such compliance-driven testing.

Basic Steps for Running a UV-Vis Measurement

Even if you’re an experienced laboratory technician, it’s good to revisit workflow fundamentals (especially if you don’t use this equipment on a daily basis). The standard workflow for running a UV-Vis measurement includes:

  • Prepare and dilute the sample: Make sure your sample falls within the range of the Beer-Lambert Law. Dilute it with an appropriate solvent and record the dilution factor so you can use it in your calculations.
  • Select the correct wavelength: Set the device to the wavelength of maximum absorbance. If you aren’t sure what that is, run a spectral scan to determine the absorbance peak.
  • Calibrate with a blank sample: Fill a cuvette with your solvent or buffer and use it to zero the instrument. This process ensures that only your analyte is being measured.
  • Measure absorbance or transmittance: Insert the cuvette into the device and record the absorbance or transmittance value displayed on the interface.
  • Record and analyze results: Apply the Beer-Lambert equation or refer to your calibration curve to convert absorbance into concentration. Document all conditions for traceability and reproducibility.

Best Practices for Accurate Results

Even a top-of-the-line spectrophotometer will underperform if you don’t adhere to basic handling practices. The following tips will help you attain reliable data:

  • Keep cuvettes clean: Fingerprints, smudges, and residue on the optical surface scatter light and introduce error. Ensure you handle cuvettes by their frosted sides and rinse thoroughly between samples.
  • Avoid air bubbles: If there are bubbles in the path of the light, you may get significant absorbance artifacts. Make sure you de-gas or gently tap to remove bubbles before taking measurements.
  • Warm up your instrument: 15–30 minutes of warm-up time is typically required to achieve a stable output.
  • Calibrate frequently: Routinely re-zero using a fresh blank, especially when changing multiple matrices. If you’re running critical applications, run check-standards at the start and end of a session.
  • Maintain consistent sample preparation: Variations in solvent, pH, temperature, or mixing can all shift absorbance values. Standardizing (and consistently following) your sample prep protocol will help you reduce run-to-run variability.
  • Check your cuvettes for compatibility: If your UV measurements are below 340 nm, avoid using plastic cuvettes. Instead, use quartz to avoid artificially high absorbance readings.

Find the Right UV-Vis Spectrophotometer at BaneBio

What does a spectrophotometer measure? It ultimately comes down to one thing: light, and what happens to it when it passes through your sample. The long-term value of that measurement is what makes a UV-Vis spectrophotometer the powerhouse of lab equipment that it is. That said, only a deep understanding of the equipment and processes will allow you to unlock its full research potential.

At BaneBio, we understand that access to reliable, well-maintained analytical equipment is essential to doing good science. That’s why we offer a carefully quality-tested inventory of new and pre-owned UV-Vis spectrophotometers. Reach out to us or browse our inventory to find the right equipment for your scientific needs!

Posted on

Everything You Need to Know Before Buying a Biosafety Cabinet

A lab tech working underneath a biosafety cabinet.

Safety has always been non-negotiable in the lab, but maybe never more so than in today’s exacting research and clinical environments. Which brings us to the biological safety cabinet, aka biosafety cabinet, aka BSC. These have become some of the most essential tools for protecting laboratory personnel, the environment, and, of course, the integrity of scientific work: providing a controlled, ventilated workspace that prevents the spread of biohazardous materials during sensitive procedures.

As such, choosing the right BSC is a serious investment in compliance, performance, and safety. The wrong purchase can lead to costly downtime, regulatory issues, or even exposure risks. That’s why working with an experienced partner like BaneBio, which provides comprehensive new and used laboratory equipment as well as integration solutions, can help ensure your lab’s investment delivers long-term reliability and peace of mind.

1. What Is a Biological Safety Cabinet?

A biosafety cabinet allows scientists to safely handle infectious or potentially hazardous materials by providing three levels of protection:

  • Personnel protection, preventing users from being exposed to harmful agents.
  • Product protection, maintaining sterile conditions to avoid sample contamination.
  • Environmental protection, keeping contaminants from escaping into the lab.

Through carefully balanced airflow and filtration, BSCs create a barrier between the operator and materials inside, ensuring both safe research and environmental containment.

2. Key Types and Classifications of BSCs

Biosafety cabinets are categorized into three main classes, each designed for specific applications and protection levels:

  • Class I BSCs protect personnel and the environment but not the product. These are suitable for low- to moderate-risk biological agents.
  • Class II BSCs are the most common type, offering protection for personnel, product, and environment. Subtypes (A1, A2, B1, B2) differ in how air is recirculated or exhausted.
  • Class III BSCs are gas-tight, fully enclosed cabinets designed for maximum containment and are typically used in BSL-4 facilities handling the most dangerous pathogens.

Selecting the wrong class can compromise containment or product integrity, making proper classification critical for compliance and safety.

3. Criteria for Selecting the Right BSC for Your Lab

When evaluating which BSC fits your lab’s needs, consider the following factors:

  • Usage & Biosafety Level: The agents and applications you’ll be working with—such as microbiology, tissue culture, or diagnostic testing—determine the necessary protection level.
  • Space & Location: Room layout, ventilation, and traffic patterns affect airflow and safety. Placement should minimize turbulence and disruption.
  • Performance Standards & Certification: Choose cabinets that meet NSF/ANSI 49 or EN 12469 standards and ensure annual recertification.
  • Budget & Lifecycle Costs: Look beyond the initial purchase price, remembering to include filter replacement, maintenance, and energy costs in your analysis.
  • Integration & Support: Partnering with an experienced provider like BaneBio ensures professional installation, validation, and long-term service.

4. What to Check Before Purchase & Installation

Before purchasing, verify that your selected biosafety cabinet meets performance and certification requirements. Confirm that the airflow configuration (recirculation or exhaust) matches your biosafety level. The installation site should be free from strong drafts, HVAC vents, or heavy foot traffic.

Plan for validation testing immediately after installation to confirm containment performance. Additionally, consider future maintenance and the potential need for decommissioning or relocation of existing cabinets.

5. Long-Term Maintenance and Compliance for BSCs

A biosafety cabinet isn’t a “set it and forget it” piece of equipment. Regular filter changes, airflow testing, and decontamination are essential for maintaining safety and performance. Skipping routine maintenance can lead to compromised containment, regulatory violations, and product contamination.

BaneBio offers comprehensive lifecycle support, including certification, preventive maintenance, and repair services, ensuring your BSC remains compliant and operational for years to come.

6. Why Choose BaneBio for Your BSC Needs

BaneBio is more than an equipment supplier; we’re a full-service laboratory systems integrator. From consultation and selection to installation and certification, BaneBio provides end-to-end support for your biosafety cabinet and other critical lab systems.

For example, when one research lab faced repeated airflow issues after purchasing a non-certified cabinet, BaneBio’s experts helped assess the problem, replace the unit with a compliant model, and restore proper containment: preventing potential contamination incidents and improving lab efficiency.

No Small Decision

Selecting the right biosafety cabinet is a decision that impacts every aspect of laboratory work: safety, compliance, and performance. From understanding the correct class to planning for installation and long-term upkeep, every step in the process matters.

So whether it’s new or used laboratory equipment, including BSCs, with BaneBio’s expertise your lab gains a trusted partner dedicated to all of the above. To evaluate your current BSC setup, explore upgrade options, or plan for a new installation that protects your team and supports your scientific mission, schedule a consultation with us today

Posted on

A Guide to Understanding the Various Lab Incubator Types

Lab incubator holding petri dishes

Last month, we discussed a staple of scientific research, an essential addition to any laboratory: the lab incubator. Now, we want to take a closer look at this device, namely the different types available for different kinds of research and experimentation.

We know incubators are essential tools in scientific research, diagnostics, and other related applications, but knowing which kind is best suited to a specific goal is paramount to success in the scientific field. Different experiments have different requirements, so let’s break down the different laboratory incubator categories.

Standard Lab Incubator

This is your basic laboratory incubator. But don’t mistake “basic” for low quality. It’s much the opposite, in fact, thanks to its ability to carry out a bevy of general, oft-necessary jobs in a lab—albeit with fewer bells and whistles. They can maintain stable temperatures above ambient levels, and they’re typically pretty user-friendly.

Their common applications include:

  • Educational laboratories for microbiology experimentation
  • Routine research that involves bacteria and yeast cultures
  • The study of cell growth and development

If your laboratory doesn’t have advanced needs, and instead focuses on standard experimentation, this is a must-have incubator that doesn’t break the bank with features you’ll likely never use.

CO2 Incubator

Are you working in a lab that deals primarily with cell and tissue cultures? A CO2 laboratory incubator is an invaluable addition. It’s preferred in places where environmental control is a make-or-break factor in research. This is thanks to its ability to precisely control temperature, humidity, and carbon dioxide levels. The goal is to mimic the environment in which the cells you’re studying are accustomed to existing.

Here are some key benefits:

  • Proper pH is maintained thanks to stable CO2 levels.
  • Samples don’t dry out thanks to proper humidity levels being maintained.
  • Ideal for research into medical, pharmaceutical, and cancer applications.

If your lab works primarily with mammalian cells, this lab incubator will become its cornerstone. You simply can’t effectively conduct this kind of research without it.

Refrigerated Incubator

Need to turn down the temperature for a study that requires more frigid environments? This kind of laboratory incubator fits the bill. Don’t worry; it can also achieve higher temperatures like its counterparts if your research requires it.

Typical uses of a refrigerated incubator include:

  • Enzyme activity experiments
  • Environmental testing such as soil and water analyses
  • Study of microbial growth at low temperatures

With a wider range of temperatures available, specialized experiments that require flexibility are made much simpler.

Shaker Incubator

Sometimes, controller incubation and continuous agitation are necessary for experiments. Enter the shaker incubator. It’s an indispensable tool for growing bacterial cultures and conducting protein expression studies.

Here are the primary advantages a shaker incubator provides:

  • Uniform sample mixing
  • Optimal microbial growth as a result of improved aeration
  • High reproducibility of an experiment’s results

A shaker incubator is particularly useful in molecular biology and biochemistry labs. In these environments, liquid cultures are a frequent occurrence.

Hybrid/Multifunctional Incubator

Some labs have especially complex scientific needs. A wide temperature range may be needed, or the research stages could have vastly different parameters. Whatever the level of complexity, an incubator that can fulfill these requirements is important. That’s where a hybrid or multifunctional incubator comes into play.

These models are essential for combining features vital to experimentation—shaking, CO2 control, refrigeration, and so on. This offers you multiple capabilities within one system, meaning you don’t have to overinvest in multiple lab incubator variations. 

Why are they so valuable?

  • Able to fulfill a diverse range of projects
  • Space-saving designs compared to utilizing and storing multiple incubators
  • Great for laboratories that have ever-evolving research needs

Which Lab Incubator is Right for You?

When it comes to selecting all the right pieces of equipment for your laboratory, an incubator is probably high on your list of priorities. It mainly comes down to the kind of research you intend on conducting. Will you be studying enzyme activity? Monitoring microbial growth? Researching medical applications? Maybe you’ll just need a more general-purpose laboratory incubator, but it’s important to make this distinction before purchasing.

If you’d like to browse our selection of incubators, you can click here or browse our site on your own. There’s plenty to discover (and it all has a quality guarantee). Still unsure of which decision to make? Not a problem. Get in touch with us and we’ll be happy to help you choose the right lab incubator for your scientific endeavors!

Posted on

What Is a Lab Incubator and How Does It Work?

Scientist using a lab incubator

Total control is essential in a laboratory setting, with several tests and experiments relying on precision in various fields for optimal results. There is perhaps no better example of total control than a lab incubator, then. It’s a specialized piece of equipment that provides biological samples with a stable, controlled environment. It allows you to regulate temperature, humidity, and even CO2 levels. Because of these vital functions, incubators are essential in cell culture, microbiology, pharmaceuticals, medical diagnostics, and environmental science.

If you’re not familiar with the ins and outs of these crucial pieces of equipment, read on for all the details.

What Is a Lab Incubator?

Essentially, an incubator can create the ideal environment a sample needs to achieve a chemical reaction. Through this simulated environment, proper studies can take place without being interrupted by outside factors.

Various types of incubators exist, all designed for certain functions

  • Standard: The most common version, used for general microbial growth
  • CO2: Vital in cell culture research that necessitates specific conditions in the atmosphere
  • Refrigerated: Used for samples that require low temperatures
  • Shaking: These provide constant motion in addition to temperature control in order to keep samples evenly mixed

How Does a Laboratory Incubator Work?

A lab incubator works by simulating any possible environment within its specs. In these environments, humidity, temperature, and gas composition are tightly controlled. Climate is kept constant through high-tech heating and cooling systems, and sensors monitor the climate to ensure it’s kept intact. This prevents unwelcome hot or cold spots that could damage samples.

Within the chamber where samples are stored, you’ll generally find shelves and racks designed to remain sturdy and maximize available space. Glass doors and data logging systems allow for sample monitoring without needing to remove them from the device.

Incubator Uses

There are various incubator uses across scientific disciplines.

  • Microbiology: The growing and maintaining of fungal and bacterial cultures for research and diagnostic purposes
  • Cell Biology: Supporting mammalian cell growth in order to study things like cancer, genetics, and tissue engineering
  • Medical and Pharmaceutical Research: Diagnostic development, drug testing, and vaccine research is the primary focus
  • Environmental Research: The study of water, soil, and plant samples in order to gain an understanding of ecological systems and the environmental factors related to them

Essentially, incubators have a place across a wide range of scientific fields. Without them, research would be much more difficult and time-consuming.

Why a Laboratory Incubator Is Essential

It’s difficult to stress enough the importance of a lab incubator. Not only are they incredibly versatile, but they’re reliable and consistent when utilized for scientific experimentation. They allow for results that are reproducible if uniform conditions are maintained.

Additionally, incubators offer a high level of protection for scientific samples that are delicate and prone to contamination. By controlling the environment these samples are kept in, you can keep contaminants out and minimize the risk of causing physical damage. In essence, controlled experiments would be nearly impossible without the help of a laboratory incubator.

High Quality Incubators at BaneBio

In many ways, a lab incubator is the backbone of countless scientific advancements. It allows researchers to maintain optimal sample conditions while they grow, test, and study them. And for all the impressive technology the field of science has access to these days, it’s only getting better. Advancements driven by smart monitoring systems, automation, and sustainable design are part of a bright future for the field of science.

If you’re in need of replacement or additional lab incubators, look no further than BaneBio—the home of the scientific supermarket. We offer new and used equipment that’s been tested and certified for use.

To browse our full selection of equipment beyond incubators, take a look at our products page. We also have an eBay storefront that boasts an abundance of products that will complement your scientific research.

Further questions? We’re happy to start a conversation! Get in touch with us today!

Posted on

What is a Microplate Reader? Everything You Need to Know

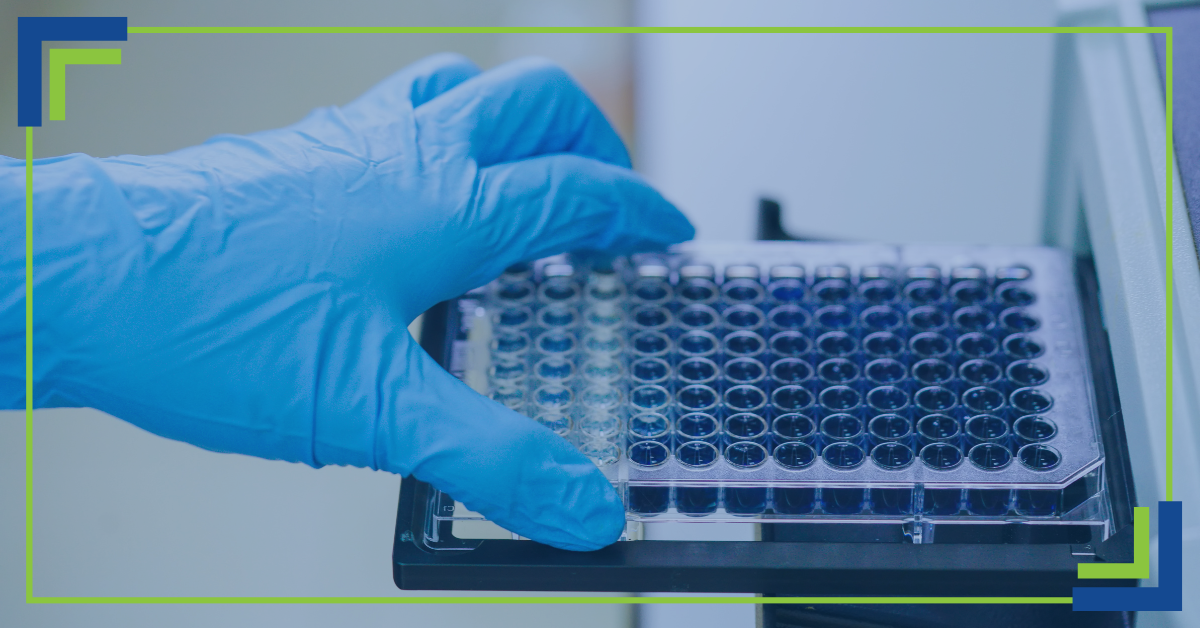
Scientist using a microplate reader

Efficiency is key in the world of science. There’s a lot to get done, and we can’t expect a vast array of scientific breakthroughs to happen without the help of various technologies. One such technology is none other than the microplate reader. Designed with precision in mind, it can measure chemical, biological, and physical reactions within microplates. This makes it an invaluable tool in life sciences, environmental research, and pharmaceutical development.

Whether you’re performing research on drug compounds or monitoring cell growth, it’s important to understand this technology so you can get the most out of it. In this blog, we’ll go over it all!

What is a Microplate Reader?

Also known as a plate reader, this lab device can detect—and quantify—events within microplate wells. These wells can number anywhere from 6 to 1,536, so efficiency and speed are needed here. There are various tests that can be performed by these plate readers, such as:

  • Enzyme-linked immunosorbent assays (ELISA)
  • Protein and nucleic acid quantification
  • Cell viability and proliferation assays
  • Kinetic studies

With the aid of these readers, throughput and consistency benefit greatly in data collection procedures.

Product recommendation: Tecan Plate Reader

Key Components

There are several core components of a plate reader that determine its function and versatility:

  • Optical System: This detection system varies based on the type of assay being observed—absorbance, fluorescence, or luminescence.
  • Microplate Format: Compatibility is possible with a variety of formats, including 6-well, 24-well, 96-well, 384-well, and 1536-well. This allows for the scaling of assays depending on throughput requirements and sample volume.
  • Detection Technologies: Many advanced plate readers have multiple modes of detection, kinetic capabilities, and temperature control. Some even have built-in shaking mechanisms. These features provide several options for complex experimental protocols.

Different Types

There are two main categories of microplate reader—single-mode and multi-mode.

Single-Mode Readers

These only allow for one kind of detection (an absorbance microplate reader, for example).They’re suitable for labs that have specific, repetitive assay needs, and they are generally much more affordable than multi-mode readers.

Multi-Mode Readers

Multi-mode readers (such as the Molecular Devices iD3 Micro Plate Reader SpectraMax) offer multiple modes of detection in a single device. They’re a great option for laboratories that have a diverse array of assays or require flexibility for changing research needs.

Common Types of Plate Readers

  • Absorbance Microplate Reader: Used for colorimetric assays such as ELISA
  • Fluorescence Reader: For DNA/RNA quantification as well as cell-based assays
  • Luminescence Reader: Used in ATP quantification and reporter gene assays
  • Multi-Mode: Versatile systems that can be used for various detection methods

Common Applications in Laboratories

Several scientific fields benefit from these plate readers. Some of the more common applications are:

  • Life Sciences Research
      • ELISA for detecting antigens and antibodies
      • Quantification of proteins and nucleic acids
  • Drug Discovery
      • High-throughput screening
      • Biochemical and cell-based assay response monitoring
  • Cell-Based Assays
      • Measuring cell proliferation, signaling pathways, or cytotoxicity
  • Environmental Monitoring
    • Detecting toxins in water, air, and soil samples

Benefits of Using a Microplate Reader

There are plenty of positives to using a microplate reader. For one, they offer high-throughput analysis thanks to their ability to run hundreds of samples at once. Not only is this an impressive quantity, but precision and accuracy are not sacrificed as a result.

Manual errors are reduced and workflows are streamlined with minimal operation intervention. This frees up valuable time that can be devoted to focusing on human-reliant tasks, making plate readers an essential fixture in an analytical laboratory environment.

Factors to Consider When Choosing a Reader

There are a few key factors you should keep top-of-mind when you’re comparing different plate readers.

  • Application Needs: What types of assays—ELISA, fluorescence-based—do you need to run?
  • Plate Formats: What are your throughput requirements? Larger plates allow for the reading of higher sample volumes.
  • Budget and Scalability: Single-mode readers are perfect for labs focused on one type of assay need, while a multi-need laboratory may need to spend more money to acquire a multi-mode device. 
  • Software Compatibility: Make sure you choose a reader that’s compatible with your related equipment.

Conclusion

At BaneBio, we offer a vast array of readers—such as the Tecan plate reader. Whether you’re looking for single- or multi-mode readers, you’re bound to find what you’re looking for here. For further questions or to make a purchase for your laboratory, get in touch with us today!

Posted on

What Is an Automatic Pipette & How Does It Work?

Decorative image of an automatic pipette system

When it comes to lab work, the handling of liquids is a process that needs to be done with maximum precision and safety at all times, whether you’re conducting routine tests or handling highly volatile compounds. Part of this handling is measurement and transfer. How do you make sure this is done with absolute precision? This is where the automatic pipette comes into play. It’s an indispensable tool that helps scientists immensely, streamlining workflow and mitigating human error.

In this blog, we’ll go over exactly what it is, how it works, and how your lab can benefit from its use.

What Is an Automatic Pipette?

Much more precise than a manual pipette, an auto pipette aspirates and dispenses highly precise amounts of liquid on a consistent basis, with minimal manual input required. Whereas a manual version relies on human dexterity, its automatic counterpart utilizes mechanical and electronic functions to maximize precision and speed on a consistent basis.

There are various types of automatic pipettes that are ideal choices for a variety of work types.

  • Single-Channel: Used to transport liquid one channel at a time. This is a common type, used in most general lab environments.
  • Multi-Channel: This allows for simultaneous dispensing through multiple channels, which is ideal for high-throughput tasks.
  • Electronic: These have various electronic functions that can be programmed by the user. Digital displayed and motorized dispensing allows for incredibly accurate control.

Key Components

When you understand the basic components of an automatic pipette, you can use and maintain it properly. Let’s go over the primary parts:

  • Plunger/Button Mechanism: This feature initiates aspiration and dispensing. Note that electronic models may have programmable buttons in place of a plunger.
  • Tip Ejector: A mechanism that allows the user to dispose of tips without touching them.
  • Digital Volume Display: Exclusive to electronic pipettes, this displays vital information such as target volume.
  • Disposable Pipette Tips: Vital for preventing cross-contamination. These should be disposed of after one use.

How Does an Automatic Pipette Work?

An auto pipette functions by utilizing air or positive-displacement mechanisms. If you’re operating one, here is the general process:

  • Adjust the volume dial, or input it on the digital display if you’re using an electronic pipette.
  • Place a sterile tip on the end of the pipette. This tip will be disposed of when you’re finished.
  • Press the plunger to the first stop, place the tip into the liquid, and release to draw the proper amount of liquid.
  • Place the tip into the opening of the target container and press the plunger. This will dispense the liquid.

Air displacement is one of two main operation mechanisms, using an air cushion that sits between the piston and the liquid. Positive displacement, on the other hand, sees the piston contact the liquid directly, which minimizes evaporation and improves performance with volatile and viscous liquids.

Benefits of Using Automatic Pipettes

There are various advantages to using an automatic pipette in your lab, such as:

  • Enhanced Accuracy and Repeatability: The possibility of human error and variability is kept to a minimum.
  • Improved Ergonomics: Less force is required, which mitigates strain on the hand and reduces injuries from repetitive stress.
  • Increased Efficiency: Automation greatly speeds up workflows, which leads to high productivity. This is especially useful in high-volume lab environments.

Lab Applications

There are several scientific disciplines that lend themselves to the use of an auto pipette. For example, it’s an invaluable tool in clinical diagnostics where patient samples and reagents need to be handled with the utmost care. In pharmaceutical research, dosing requires maximum precision, which can’t be achieved consistently through the use of a manual pipette. In the field of molecular biology and chemistry, there are various uses—a primary one being in PCR, ELISA, and titration, in which exact measurements are vital to the research.

Find the Perfect Automatic Pipette at BaneBio

The importance of the auto pipette in a laboratory cannot be understated. It’s a vital tool in many types of research and lab procedures, offering maximum precision and efficiency. Your researchers will save valuable time through their use, freeing them up to focus on tasks that require more manual processes.

If your laboratory doesn’t yet have these pipettes, we know the perfect place to get them. Get in touch with BaneBio and stock up on these vital tools!

Posted on

Do You Need a Horizontal or Vertical Laminar Flow Cabinet?

Scientist using a laminar flow cabinet

A laminar flow cabinet (or hood) is an essential addition to any laboratory that needs to prioritize contamination control. It helps maintain a sterile environment that serves various research endeavors—handling sensitive electronic components, conducting microbiological research, prepping pharmaceuticals, and more.

Not all of these cabinets are the same, though. Choosing between the two main configurations can have a significant impact on the efficiency, comfort, and safety of your work. So here’s the big question: Does your lab need a vertical laminar flow hood or a horizontal laminar flow hood? The answer depends on a few factors, which we’ll get into in this blog.

What Is a Laminar Flow Cabinet?

First off, let’s take a look at what this kind of cabinet is, as well as the purpose it serves. It’s essentially a workspace that’s designed to protect samples from contamination by using a constant flow of uninterrupted, filtered air. The air passes through a HEPA filter, sweeping away any airborne contaminants before they can reach vulnerable samples.

These cabinets are versatile in their applications, from electronics and optics manufacturing to medical labs and pharmaceutical compounding. These are all environments in which microscopic contaminants can post a risk to safety and results.

Vertical Laminar Flow Hood

Vertical cabinets draw air from above the unit, pushing it downward through the HEPA filter and creating a vertical flow of air across the work surface.

Benefits include:

  • Enhanced safety for powders or aerosols: Because of the downward direction of the air, particles are generally being pushed away from the user’s face, thus offering more protection when working with airborne materials.
  • Compact design: Counter space needs to be optimized in a lab environment, allowing enough space for equipment to sit and research to take place. A vertical hood helps you make good use of space when you only have so much to work with.

Common applications include:

  • Pharmaceutical compounding
  • Cell culture and microbiology labs
  • Environments that deal with hazardous airborne particles

Horizontal Laminar Flow Hood

Rather than moving air downward, a horizontal laminar flow cabinet pulls it through a HEPA filter situated at the back of the unit. It then pushes the air horizontally across the work surface in the direction of the user.

Benefits include:

  • Reduced turbulence on work surfaces: Thanks to the airflow being smoother and overall more consistent, delicate or static-sensitive components are more protected in a horizontal laminar flow cabinet.
  • Improved user comfort: Because the air is flowing away from the user’s face, horizontal cabinets are ideal for longer work sessions thanks to increased comfort.

Common applications include:

  • Medical device assembly
  • Handling of electronic and optical equipment
  • Laboratory environments that require gentle, uniform airflow

Key Factors to Consider When Choosing

If you’re having trouble choosing between a horizontal and vertical cabinet, there are some key considerations that should make the decision a bit easier.

  • The nature of your work: Are you frequently dealing with biohazards, sterile preparations, or volatile substances? If so, consider this: Vertical cabinets are ideal for hazardous or powder-based materials, while cleaner, more-sensitive operations will go more smoothly with a horizontal hood.
  • Space and layout: If your lab has limited space, a laminar flow cabinet that stands vertically is likely the better option.
  • User comfort and workflow: If you’re looking for a more ergonomic user experience—especially when working for long periods of time—a horizontal cabinet is your best bet.
  • Regulatory compliance: Make sure the unit you choose aligns with industry standards and guidelines. As an example: USP <797> and <800> for sterile compounding.

Which Laminar Flow Cabinet is Right for You?

When it comes down to it, the best laminar flow cabinet depends on the applications you wish to use it for, your comfort preferences, and workspace constraints. If you want to prioritize safer handling of powders and biohazards, as well as space efficiency, a vertical cabinet is ideal. On the other hand, if you’re working with clean, non-hazardous materials that demand smooth airflow and ergonomic setups, a horizontal cabinet is likely the better choice.

Make Your Choice

Choosing the right laminar flow cabinet for your needs is more than a simple technical decision—it’s about safety, productivity, and compliance. All of these things are contributing factors in your laboratory’s success, so it’s important to weigh your options carefully. By understanding the differences between vertical and horizontal cabinets, your decision will be more informed and you can set yourself up for success.

If you still need some help making your selection—or if you’re ready to pull the trigger on a purchase—the team at BaneBio is ready to help you in the process. Get in touch with us today!