Posted on

Lab Water Purification Systems: Ensuring Purity and Precision

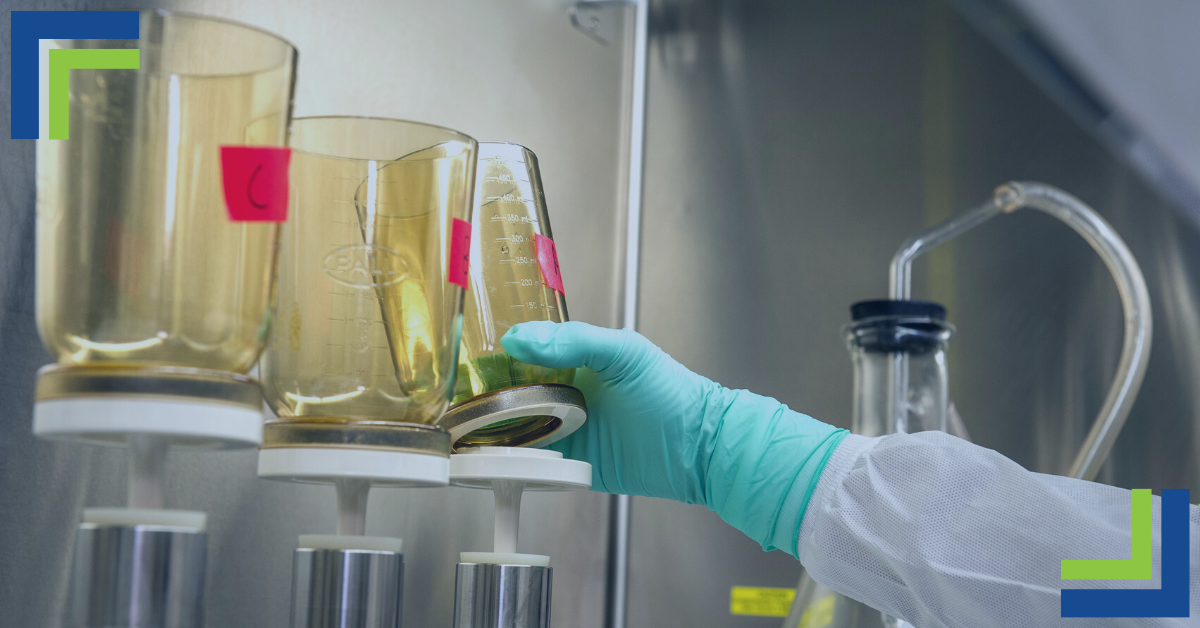
laboratory that uses water purification systems

When we drink water at home, most of us are aware that it may not be the world’s purest water. This doesn’t necessarily mean it’s dirty, but tap water has rarely been through high-quality filters. We’re okay with that, and we accept a certain level of “stowaways” in our water. When it comes to laboratory science, however, we don’t have that luxury. Pure water is a necessity, not a preference. Even in trace amounts, contaminants can compromise entire experiments, leading to inaccurate data. That’s why water purification systems are vital to a lab’s operations.

But what exactly do these systems do? How do they work, and why are they so important? Let’s take a closer look.

Understanding Lab Water Purification Systems

There are several different types of water purification systems, each one designed to eliminate specific contaminants and meet the proper purity requirements for research.

  • Reverse Osmosis (RO): With this system, water is forced through a semipermeable membrane, which filters out impurities like ions, particles, and large molecules. RO is ideal for providing water that meets most general laboratory standards.
  • Deionization (DI): Often used in combination with other purification processes, this uses ion-exchange resin to remove dissolved ions from the water. This produces very pure water that is required for sensitive applications.
  • Ultrapure Water Systems: These systems are designed to remove ultra small contaminants from the water. These contaminants include organic compounds, bacteria, and endotoxins. Water of this purity level is vital for processes like molecular biology or mass spectrometry.

How These Systems Work

That’s what they do, but how do they actually work? RO systems rely on pressure to push water through the membranes, which trap the impurities. DI systems, however, use resins to replace ions with hydrogen and hydroxide. The combination of these two forms pure water. As for ultrapure systems, they can incorporate either of these techniques, but also implement additional filters—such as IV sterilization—to maximize water purity.

Key Benefits of Using Water Purification Systems in Labs

Water purification systems can provide several benefits to your experiments, safety, and expenses.

Precision in Experiments

Water purity has a direct correlation with the accuracy and reproducibility of experimental results. Since contaminants can interfere with reactions, skew measurements, and introduce unwelcome variables, maximum purity is essential. Otherwise, the integrity of your data and its consistency could be compromised.

Safety and Compliance

Laboratories are subject to some of the strictest regulatory standards in the world. These standards often dictate the acceptable levels of contaminants in experiments. These regulations are in place to protect the well-being of lab personnel and the general public, as hazardous materials are often used in lab environments. Contaminated water can pose serious risks when interacting with these materials.

Cost Efficiency

A high-quality lab water purification system may carry a hefty up-front price tag, but the overall savings that result from it are worth the investment. Contaminated water can damage sensitive equipment, which could result in costly repairs over time. In addition to that, high chances of invalid experiments have the potential to waste resources and time. Pure water will help you avoid these issues and maximize efficiency.

Choosing the Right Water Purification System

There are several factors that will determine your choice in purification systems.

  • Quality of Water Required: This is likely the most important factor for most people. Ultrapure water is essential for sensitive applications, while RO or DI will work for more general applications.
  • Volume Needs: How much purified water does your lab use on a daily basis? Be sure to factor this in and choose a purification system that can handle the proper output.
  • Specific Lab Applications: It’s important to tailor the system to your lab’s needs. For example, certain labs require more filtration stages or customized features depending on the goals of the research.

Customization Options

If you want to further customize your lab water purification system—research needs are diverse, after all—there are plenty of options to do so. Modular designs, advanced monitoring systems, and integration with existing infrastructure are within the realm of possibility. This level of customization ensures your system will meet purity requirements and align with your workflows.

Conclusion

The pursuit of scientific excellence is what drives much innovation. The proper equipment—including water purification systems—is vital to its success. From maximizing safety to improving the accuracy of results, purified water plays a foundational role in good scientific practice. For further assistance or advice on these vital systems, get in touch with us at BaneBio. We’ll be happy to help!

Posted on

Improving the Quality Control Standards in Your Laboratory

lab worker organizing equipment

What is laboratory quality control? That’s a loaded question if we’ve ever heard one. With so much science happening in one area, it’s important to adhere to strong standards. This ensures that you can keep doing the tests and research that drives your passion without worrying about hitting snags of any kind.

So what kinds of protocols do labs need to follow? It’s about more than just keeping the workspace clean and maintaining attention to detail. Let’s go over some of the quality control standards you should be vigilant about maintaining. 

Organization

There are likely several people in and out of your lab from day to day, meaning there are several studies and experiments happening at the same time. Keeping these organized and running efficiently largely depends on having the right people in the right positions. Be sure to maintain a hierarchical chart and update it when necessary. Lab managers, safety officers, and quality control supervisors are all vital positions whose jobs should be done diligently.

Inventory

There’s a lot of equipment within the walls of a lab. Because of this, it’s important to document and categorize each item in the space. Be sure to train the proper individuals when any new piece of equipment is introduced to the lab, and always make the manuals accessible to everyone. In addition, keep logs of any equipment malfunctions so you know what items need some TLC from maintenance professionals.

Personnel

Your people are the most important lab resource. Without them, everything else is useless. That’s why it’s so important to make sure they’re always working to the best of their abilities. We’re not suggesting you run things like a boot camp, but routine training and staff/management meetings are a great way to keep open dialogue across the board. Making sure everyone is adhering to the lab’s Standard Operating Procedures (SOPs) is paramount, so performance and proficiency tests need to happen as well.

Process Control and Improvement

Process is important for any successful business, but more so for a lab. The focus here is the handling of samples, equipment, and other specimens. We’ve already touched on making sure personnel receive proper training on equipment, but it’s important to have pre-analytical, analytical, and post-analytical processes in place. Be sure to appoint the best person for the job to coordinate workflow.

Occurrence Management

We’re all human, meaning accidents happen. Even the best labs have faced their fair share. In preparation for an unexpected event, it’s advisable to have plans in place to mitigate the incident and take steps to prevent it from happening in the future. If necessary, consider retraining programs on equipment servicing. If you want to make sure you’re covering all your bases, a qualified entity such as Bane Bio is more than happy to step in.

Facilities and Safety

Labs contain hazardous materials. Like any establishment that works with potential dangers such as this, having strict safety policies is a must. Making all safety equipments such as, first aid kits and extinguishers easily accessible should be a priority as well as mandatory safety trainings for everyone who works in the lab. As mentioned above, you should have an emergency response plan in place… just in case!

Client Communication

If you’re offering lab services to external clients, it’s important to maintain an open line of communication. This allows ideas and feedback to travel between both parties quickly, which helps the overall process stay on track!

Document Everything

Take everything we’ve talked about thus far and document it thoroughly. Lab rules, hours of operation, current projects, safety protocols—all of it should be documented to include every detail. SOPs should be in writing for all procedures including specimen collection, storage, transport, and disposal.

This is just a brief overview of the things you should be keeping in mind to maintain the safety and efficiency of your lab. We could go on all day about methods for improving laboratory quality control—it’s a passion of ours! We hope you use this as a starting point for developing your rock-solid quality control protocols.

For any laboratory equipment or service needs such as logistics, repairs, or service plans, keep BaneBio top-of-mind. We’re the home of the scientific supermarket, and we’re here to help!


Posted on

Emergency Preparedness: Expecting the Unexpected in Labs

scientists working in lab

Like it or not, a laboratory can be a dangerous place. After all, it’s filled with chemicals as well as equipment that’s often heavy, fragile, sharp, or all three! That doesn’t mean all laboratories are dangerous, though. In fact, yours can be pretty safe, as long as you maintain a heavy focus on safety at all times.

The first step to being safe is anticipating what can go wrong, so why don’t we talk about some common hazards that you may have to deal with in your lab?

Emergency: Fire

You should always be wary of the potential for a fire, but pay extra close attention to a few select places. If you store flammable chemicals in your lab, this is a highly likely spot for a fire. The same goes for electronics, especially those that are meant to provide heat for any purpose.

While anticipating flames is important, you should also be prepared for a scenario in which it actually happens. Is there a sprinkler system that will kick in? Do you know where the fire extinguisher is? Do you know how to access and use it? Be sure to provide proper training for this equipment to all lab employees so that everyone is prepared if the situation were to occur. 

Emergency: Flood

Depending on the situation, water can be a great help or an immense hazard. In a lab, it can become the latter in several ways. Is the lab in an area where rain is common? Is it on the first floor of the building? Are there a lot of overhead pipes that could potentially burst?

If your answer to any of those questions is “yes,” be sure to have a contingency plan in place. Floor drains are highly advisable, as is equipment that you can use to manually remove water, like an industrial shop vac. It’s also crucial to keep water away from any electrical equipment that could harm you should it get wet, so be mindful of this if you find yourself in an unfortunate flooding situation.

Emergency: Extreme Weather

Nature will always be a force to be reckoned with, even in the perceived safety of the indoors. It can be a catalyst for the aforementioned flooding, but water damage isn’t the only thing bad weather can bring.

It’s always wise to anticipate strong winds from hurricanes or tornadoes. If you’re in the planning stage for your lab, consider finding a space away from outside walls and windows of a building. Should your lab still be at the mercy of destructive winds, remember your employees’ safety is top priority. Ensure they are in the safest place possible should bad weather hit while they’re in the lab. Memorize all the shelter in place procedures and know the “danger zones” to avoid.

Emergency: Hazardous Material Spill

Of all the potential emergencies a lab can face, hazardous materials present the widest range and most common forms of danger. Depending on what chemicals are being used, you could be facing anything from chemical burns to explosions.

Most chemical spills are easily dealt with by laboratory staff, but only if the lab itself provides them with the necessary equipment. Eye wash stations are a must, as well as proper protective gear and disposal containers. In the event of a more subtle emergency such as a gas leak, it’s imperative that monitoring devices are in place. Just as you wouldn’t set up a lab without a sprinkler system, you need to have things in place to detect harmful substances.

What about the incidents that are too big for your staff to handle? Having a rock solid response plan is crucial. Know the evacuation procedure, how to clean yourself off, and who to call to handle the cleanup. All of these procedures should be memorized by everyone before even a single bunsen burner is turned on.

Setting up a lab is hard work, but it’s all worth it to make sure things are done properly and employees are kept safe. While cutting corners may seem productive in the immediate future, you’ll be regretting it if you’re faced with a lab fire or hazardous material spill. BaneBio is an industry expert in setting up your lab for success. With extensive experience in lab logistics, we’ll make sure you start on the right foot with safety in mind.

Posted on

How to Successfully Set Up a New Lab

scientist working in lab

It’s the biotech entrepreneur’s dream. A science-based startup business’ Graceland, if you will. It’s lab design time, and BaneBio is here to walk you through the process of setting up your new lab design. 

The Business of Labs

The best opportunities begin with business plans, and a lab is no exception. Your business plan should include the following:

  • An executive summary
  • Company description
  • Market analysis
  • Organization structure
  • Management structure
  • Outline of services
  • Products offered
  • Funding request

This high-level overview of your company spells out why you know your lab will be successful, the services it will provide, the structure in place, and where dollars are allocated to make it profitable. If you’re looking for investors or a loan, this plan will come in handy to pique their interest. 

The Space

There are several ways to get rolling on your lab, from leasing spaces that once housed labs to building your business to spec. Although it is more costly to start from scratch, trying to fit into a former science space may not be ideal if they were not operationally set up similarly to the services and research you’ll offer. 

The Start-Up

Building a lab from the ground up is an investment. It’s one of the reasons why BaneBio is home of the scientific supermarket and is meticulous about prime used lab equipment. When selecting each piece that will make up your laboratory, following your budget is critical. Pay attention to where each dollar is going, from the flooring to the number of workspaces required. It’s not about cutting costs: it’s about making the best decisions when securing inventory and building your infrastructure. 

The Move

Moving large equipment and some lab-specific items may require specialty movers. Two guys and their truck may not be licensed to transport your items. You also want to ensure that your inventory is relocated by professionals who understand the precision required. When moving frozen storage, ensure all freezers are working and meet temperature requirements before stocking them. 

The Equipment

Now comes the fun part! BaneBio’s team is well-versed in helping labs of all sizes select just the right pieces. The type of labwork your company performs means you’ll need specific items. You can always add more tech and lab items later. What you need now is an expert like BaneBio to get you up and to run the right way. 

The Employees

You need more than a simple “Help Wanted” ad to build your team. Acquiring the right talent is critical, from compliance and labor laws to certifications and specialty areas. Remember, part of the lure to attract team members comes down to benefits, compensation, company culture, communication tools, and having the right leaders in place to encourage communication and job satisfaction. 

Let BaneBio Take the Stress out of Your New Laboratory 

BaneBio has lent its expertise and services to laboratories in the BioHealth Capital Region for over a decade. We are your trusted laboratory sales and moving service provider with the equipment knowledge, proper equipment handling materials, and proven customer satisfaction to meet and exceed your expectations.  

Don’t just let any company offer their purchasing suggestions or move your valuable scientific equipment: trust BaneBio, the Lab Logistics experts. Contact us today!

Posted on

Phases for Decommissioning a Lab

lab tech decommissioning a lab

Decommissioning is quite an undertaking whether you’re renovating, relocating, or closing a lab. It’s a project that must follow specific guidelines to ensure standards are followed with minimal liability. If you’re wondering how closing a lab works, we have the steps to follow: a lab closure checklist to assist you from beginning to end.

Develop a Plan

Before your team gets started with the phases of decommissioning a lab, you need a plan. Start by checking your equipment and chemical inventory. Once completed, it’s time to begin a full lab audit.

  • Lease obligations – If the parameters concerning moving out and decontaminating your space are vague, it can turn costly. From damage to walls and floors to discovering unanticipated waste or contaminants. It’s best to prepare for the unexpected and gather as much information as possible concerning landlord expectations ahead of time.
  • Seek guidance – Ask colleagues who have been a part of lab decommissioning for their advice concerning what worked well, what did not, and what they would have done differently. 
  • Find the stakeholders – Internally, your researchers, facilities group, the finance department, and environmental health and safety teams should play an integral part. Externally, keeping the property owner informed and part of the process is critical.
  • Dispose of chemicals and equipment – If not storing them, dispose of chemicals properly. If you have lab equipment you’re ready to part with, contact Bane Bio. We are the scientific supermarket and happy to help you sell your inventory.
  • Licenses and permits – Are there some permissions that must be managed to dispose of lab items? Some take a while to secure, like the disposal of radioactive materials. Have all licenses and permits in place before starting the big move. 
  • Decommissioning costs and enlisting partners – Some companies can help you move the process along efficiently. Working with vendors who specialize in this project may be worth the investment.
  • Storage – Are there some items that you plan on keeping? Do they have a place to go? Make sure a storage location and the proper moving help are scheduled early in the process. 
  • Safety and security – If chemical exposure is a risk, or you have high-dollar equipment moving out, safety and security plans must be enacted. 

Assess Decontamination Areas

Areas must be assessed and cleaned wherever chemicals are stored and utilized. Other rooms, like offices and common areas, will have different needs. Create a list of which rooms need decontamination and which require a little spring cleaning. It is your responsibility to clear the lab thoroughly and responsibly.

Areas to decontaminate include: 

  • Work surfaces, tables, drawers, shelves, and cabinets
  • Floors and walls
  • Waste receptacles
  • Chemical storage areas
  • Any spills
  • Cold rooms
  • Animal care areas
  • Fume hoods
  • Plumbing 
  • All lab equipment
  • Wastewater systems
  • Waste pickups

Decontamination Documentation

Note everything that’s been completed and the procedures followed. Keeping accurate records means you have answers if there are questions later on. Your records should include:

  • All assessment data
  • Means and methods of the assessment
  • Cleaning protocols for each area
  • All chemicals and hazards present during the process
  • How levels of risk were mitigated
  • All acceptable levels of risk certified by an industrial hygienist
  • Where hazardous and nonhazardous waste was disposed of
  • Where itemized equipment is now stored 
  • Photos that show the lab before and after decommissioning
  • Contact information for all who were part of the process

BaneBio understands the pressures of closing labs and what to do when you’re ready to rehouse your equipment. Let our team of highly-trained service technicians step in and assist with your gently-used items. Headquartered in Maryland, BaneBio proudly serves scientific communities throughout the world. Get in touch and let us know how we can help!

Posted on

Labs on the Move: Things to Consider When Moving Your Lab

two scientists packing up lab equipment

Moving is never easy. A residential move is considered one of the most stressful life events, so how much more stressful is it to move an entire laboratory full of equipment and employees to a new location? BaneBio makes the process a lot easier, starting with these eleven things to consider when moving your lab.

1. Timeline Flexibility

Be prepared for timelines to shift due to supply chain-related delays, difficulty in identifying quality service providers, and the labor market. Although workarounds are possible, unforeseen issues do occur, which means having some level of flexibility or contingency options built into the timeline can make a difference.

2. Facility Constraints

When deciding to relocate your entire lab, the built-in constraints of the facility should be considered.

  • Are the hallways wide enough for large equipment? 
  • Are the doors to the labs standard or lab ready? 
  • Does the facility have a loading dock or dedicated shipping/receiving area which is accessible by tractor-trailers?  
  • Does the facility loading dock require appointments for pickups/deliveries?  
  • If the facility is a multi-level building, is there a dedicated service elevator? 
  • Is the building secure?  
  • Does the facility provide the lab services, equipment, and amenities your organization needs to succeed and reach its next growth stage? 
  • Does the facility provide space and financial options suitable for expansion? 

Keeping these factors in mind can help you narrow down your decisions when choosing a new location.

3. Electrical Planning

There are many different types of lab equipment used in a biotech lab, with a variety of power requirements and plug adapters. Be sure to install proper outlets for the plugs with your equipment and, most importantly, be sure there is enough power in your lab to support the equipment you will be using. Often, insufficient power and inappropriate outlets are the top reasons for delays in getting your new lab up and running. 

4. Choosing a Lab Moving Service Provider

Let’s face it: Moving sucks and moving an R&D lab really sucks. Mapping out your move and connecting with the right moving partner can make the move suck a lot less.  

First, start with identifying and engaging with at least three laboratory moving service providers.  Talk through your move and be sure to ask questions of the prospective movers to achieve a level of trust and understanding of the scope of services required. As part of the process, ask the movers for references from previous lab moves. 

It’s best to understand the capabilities of the movers and the material handling equipment which will be used for moving specific types of equipment, such as biosafety cabinets, incubators, centrifuges, analytical instrumentation, and liquid handlers.  

Keep in mind that relocation pricing should not be the primary factor in your choice of laboratory moving service providers. The equipment in your lab is critical to your operation and requires movers with specialized processes to keep your equipment intact and operational after the move.   

5. Moving Preparations

Assign one person to be tasked with being the coordinator for the move. Having one point of contact between the lab and the moving company eliminates confusion, frustrations, and mistakes. The assigned coordinator should provide the moving company with a map of the new lab, including proposed locations for all equipment, supplies, and office furniture which are being moved. Any equipment, supplies, or furniture which are not to be moved or will be disposed of or sold should be marked.   

Equipment that is under the manufacturer service contract should be coordinated with the manufacturer to ensure the equipment is properly shut down and prepared for relocation. 

6. Pre-Move Packing

Use the days or week before the move to ‘pre-pack’ as much as possible. Employee desk contents and personal items, office items, kitchen items, lab consumables, and lab drawers are items to be considered for pre-packing. Partnering with a lab moving service provider that issues carts, cages, crates, and packaging for the pre-packing process can be a time saver. 

7. Use and Occupancy

The new lab is almost finished, and there is anxiety, anticipation, and excitement for the team to be in the new lab. There is, however, one critical missing piece that is required before the team can use the new lab: the Certificate of Use and Occupancy or, depending on the jurisdiction of your new facility, the Certificate of Occupancy.  

This is one item that can be an afterthought during the process of relocation but without this certificate, there is no occupancy or use of the new lab.  

The responsibility for this certificate usually falls to the general contractor, property owner, or builder of the new lab. Connect with them and make sure all is in order before you move in.

8. Moving Day

The big day has finally arrived. The moving company’s project manager and your assigned moving coordinator have worked out the details, and it’s time to act. 

It’s important for the success of the relocation project to keep all areas where the movers need to move equipment clear. Hallways and doorways should be clear of all barriers and obstacles to allow the movers to move efficiently.  

9. During the Move

While the move is happening, resist the urge to manage the proceedings and let the movers concentrate on moving the equipment. Any questions should be funneled through the moving coordinator.  

If anything needs to be relocated, it will be done when the moving company can accommodate the request. You hired the professionals to handle your move, so trust them to take care of everything.

10. After the Move

As the company settles into its new surroundings, some follow-up items may surface that need to be addressed with the moving company. Items such as missing boxes, equipment, or requests for items to be adjusted, shifted, or relocated should be consolidated and then provided to the company coordinator for follow-up with the moving company. 

11. Project Completion

The company coordinator and moving company project manager should discuss the move in detail to be sure the company is satisfied and the scope of the service has been completed.  The moving company should provide a summary of the services they provided, noting any items of relevance to the final invoice. 

Let BaneBio Take the Stress out of Your Laboratory Move

BaneBio has provided complete relocation services to laboratories in the BioHealth Capital Region for over a decade. We are your trusted laboratory moving service provider with the equipment knowledge, proper equipment handling materials, and proven customer satisfaction that will meet and exceed your expectations.  

Don’t just let any moving company move your valuable scientific equipment; trust BaneBio, the Lab Logistics experts! Contact us now for your laboratory moving needs.

Posted on

How to Determine & Maintain a Laboratory Budget

woman researcher looking through microscope

Whether you’re starting up a new lab or looking to improve or make budget cuts to an existing one, determining and maintaining a laboratory budget is the most important “next step” to take. Underfunded and understaffed; where do you start? Here’s a look at some helpful tips for creating a laboratory budget that you and your techs can live with.

Don’t Just Jump Into Buying Major Equipment

You may be tempted to start purchasing major equipment right away, but the secret to determining and maintaining your laboratory budget is understanding what you “need” and what’s “nice to have.” 

  1. Split your equipment list into several categories, including essential, ancillary, and wishlist. 
  • Essential equipment includes the tools you need to store and test your samples, such as refrigerators, microscopes, and centrifuges.
  • Ancillary equipment is also necessary to support your essential equipment. This list includes tubes, beakers, chemical reagents, and pipettes.
  • Wishlist: This is equipment that you need in the future, although for now you can borrow the equipment from a shared facility.
  1. Don’t forget that common equipment, such as refrigerators or appliances, as well as some supplies including paper towels and cleaning solutions are available at lower prices at some of the big box stores.
  1. Buying used lab equipment is a great way to save money on your lab budget. You can also ask for donations of equipment from other laboratories or partnering labs within your facility.
  1. Always look into purchasing the extended warranties and protections on your equipment to save money on repair or replacement.
  1. Preventive maintenance is a key factor in keeping your existing equipment running efficiently. 

Ongoing Costs

Once your initial setup is complete, it’s time to consider what consumables you will be using monthly. Your employees and team members will have a better idea of how many supplies they use monthly, so their input is a valuable resource.

It may take you a month or two to get the most accurate picture, but it’s estimated that an average sized lab will spend around $1000 a month on supplies such as pipettes, gloves, tubes, and slides. Next estimate how many antibodies, enzymes, and testing kits you will need to operate and add this into your basic recurring lab supply cost. Now add the cost of cleaning and maintenance supplies, as well as utility bills and rent or mortgage.

Lastly, look at your personnel spend (salaries, benefits, vacation, and sick days) and add that into the ongoing cost list.

Don’t Be Afraid to Make a Change

When balancing your laboratory budget, you may need to switch suppliers to ensure you are getting the lowest prices on your equipment and supplies. If you’re comfortable with the quality of supplies you are getting from your current supplier, don’t hesitate to reach out and try to negotiate a better price.

Be aware that not all suppliers have the same brands and not all brands are equal. Do a little legwork and research reviews on unfamiliar brands and suppliers before partnering with a new one.

Hiring Personnel is One of The Biggest Laboratory Spends 

By far, hiring and retaining qualified lab personnel is one of the biggest laboratory budget expenditures your lab manager will face. Here are a few ways to keep this spend down a little.

Make your lab environment inviting: Not just the lab facilities, but in the job culture. People are willing to take a little less money in salary if they truly love their jobs.

Provide educational and advancement opportunities: You can decrease turnover in your laboratory by providing continuing education and opportunities to advance. You can add a caveat, such as the minimum amount of time an employee must work to qualify for these perks, or negotiating how much time they will need to spend with your organization if they take advantage of educational opportunities.

Go shopping for eager students: Undergraduate and postgraduate students interested in the sciences can provide much of the help you need in the lab. These students can work as assistants in any number of departments. You may be able to contact universities and see if you can offer credit to student volunteers.

Offer great benefits: Circling back to the happy employee, offering great benefits is a way to make the job more inviting when you can’t pay candidates quite as much as a competitor could. A generous vacation policy, affordable health benefits, buy-in retirement plans, or even stock options can be used as leverage for your potential candidates. The costs of these benefits will be far less than the costs of high-turnover rates such as constantly training and equipping new employees.

Determining and Maintaining a Laboratory Budget: Keeping the Records

Now that you’ve created a basic guideline for creating your laboratory budget, it’s time to put it altogether. Excel spreadsheets are one option, but they can be cumbersome and confusing.

Many labs turn to solutions such as Quicken, QuickBooks, and other online budget software.

Once you’ve determined your budget, inform your teams of how it will affect them. Ultimately, it will be a shared responsibility to maintain the laboratory budget.

BaneBio has ways to keep your laboratory running within budget, from used equipment to cost- saving preventive maintenance contracts and repair services. Contact us today and let us show you how we can keep your operations running efficiently and economically.

Posted on

Research Laboratory Equipment Maintenance & Repair Checklist

3 researchers in a laboratory

The biggest investments you will ever make for your lab are purchasing your equipment, and maintaining it to keep it working properly. How do you keep it running safely, smoothly, and accurately? Here is a research laboratory equipment maintenance and repair checklist to keep your equipment humming along.

Start with an SOP

Every piece of equipment, from your microscopes to your biological safety cabinet, should have a clear Standard Operating Procedure relating to it. An SOP ensures that everyone using the equipment understands how to use it properly, and how to maintain it. Being able to prove that you have an SOP can help you in many ways, from regulatory compliance to tapping in to the warranty on a piece of malfunctioning equipment.

Your SOPs should cover, at a minimum:

  • The piece of equipment referenced, as well as the serial number, year, make, and model
  • A definition of any abbreviations used within the document
  • A list of employee job titles who have authorization to use the equipment, as well as any applicable certifications
  • Detailed instructions for proper use of the equipment
  • Detailed description of the maintenance required for the equipment

Keep a separate folder near each piece of equipment, and store all documents that came with the equipment such as guides or maintenance instructions. This is the perfect place to keep records of all maintenance, calibrations, repairs, and routine cleaning performed on the equipment.

If applicable, directions for disposing of any waste or hazardous materials should be included in each folder as well.

Routine Cleaning

Cleaning is an important part of ensuring your research laboratory equipment remains in good working order, with no chance of cross-contamination of your samples. To thoroughly clean your equipment:

Daily: 

  • Wipe down all equipment externally
  • Clean and disinfect your sinks 
  • Organize and sanitize all work spaces

Weekly: 

  • Deep clean the equipment
  • Use a 70:30 mix of alcohol or ether to clean your microscopes
  • Check for expired solutions, such as those needed to calibrate equipment

Calibration

Calibration ensures the accuracy of your test results, making this a very important step in laboratory maintenance and repair. 

  • Post signs reminding users to calibrate
  • Make a running sheet of all results after calibration
  • Ensure that all necessary calibrating supplies are near the machines
  • Keep completed calibration logs in the folder you created for the equipment SOPs

Routine Maintenance

Routine maintenance not only keeps your equipment running smoothly and accurately but it will allow you to notice issues you might have missed such as failing parts, loose pieces, and other potential troubles.

Check the manual supplied with the equipment for manufacturer’s recommendations on maintenance. Some machines require a more complete inspection annually, or every few months, to make sure they are performing optimally.

Repair, Replace, or Refurbish?

If you notice your equipment is not as reliable as it once was, you have three choices: repair it, refurbish it, or replace it.

Older pieces of equipment may still have some life in them, and refurbishing might be the answer. To refurbish your laboratory equipment:

  • Dismantle the entire piece of equipment
  • Deep clean each individual piece
  • Polish or lubricate moving parts
  • Replace parts that are showing sign of wear

If your equipment is still not functioning properly, you will need to send it out for a professional repair or have someone come to your location to fix it.

If the equipment is past its lifespan and is no longer reliable, replacing it is the best option. Luckily, used laboratory equipment is available, saving money on replacement costs. In addition, companies like BaneBio will buy your equipment or use it as a trade-in on newer equipment.

This checklist is not an exhaustive list of all your research laboratory equipment maintenance and repair issues, but it’s a good jumping off point for getting started on your own program.

BaneBio is available for repairs, relocations, sales, services, assembly, and purchases of laboratory equipment. Have a question? Contact us today to see how we can help you!

Posted on

Laboratory Pack-up & Relocation – Everything You Need To Know, Part 1

technician working in lab

When It’s Time to Move Your Lab

There’s no getting around it: moving a laboratory is a complex process that involves meticulous attention to detail, making it a stressful experience for all concerned. The actual move date will likely be preceded by 4–6 months of careful planning, even if you follow most lab managers’ recommendation that you hire an experienced lab relocation specialist. Outsourcing the project to a lab relocation specialist will minimize the move’s impact on your operation’s scientific mission and productivity.

Moving usually signals that new and exciting opportunities are ahead for a company, but it’s still critically important to plan correctly and take into account all aspects of the experience. For example, although it is important to plan out the logistics of the physical move, it is also important to take into account its emotional impact. A relocation is not only disruptive to the physical plant, but the introduction of a lab relocation specialist will change the dynamics of the organization. A good lab relocation manager will take the time to establish trust and respect with your entire team, and foster productive, collaborative relationships between his move team and your technicians, administrative personnel, and lab leads.

Make keeping everyone informed a top priority. So they can plan accordingly, your team will want to know not just the date for the move itself, but also when the equipment they use will no longer be available. Remember to talk to the facilities manager in the building you are vacating and your contact in the building you are moving into as soon as possible. These individuals will oversee everything from the disconnection and connection of your utilities to the availability of packing/unpacking areas and loading docks.

Every lab relocation is different with different priorities and steps needed to ensure a smooth and seamless transition. However, establishing a timeline is will help keep the process on track:

Two to Three Months Before the Move

  • Tour existing and new lab space with your lab transition planner and your architect.
  • Develop equipment binders and review responsibility matrix.
  • Dispose of old files, old chemicals, and old samples.
  • Notify vendors, the mail room, and other relevant parties that the lab has relocated.
  • Secure keys and access to the new space.
  • Identify who will pack the equipment and move it.
  • Set a start date and time-frame.
  • Establish a timeline to shut down certain pieces to prepare for move.
  • Send out RFP for specialist movers (chemical, equipment).

Two to Three Weeks Before the Move

  • Have boxes, tags, and other materials delivered to the lab so that packing can begin
  • Begin labeling each piece of equipment with a separate label that includes the name of the lab, the phase of the move in which it should be handled, and where it should be placed in the new lab.
  • Tour the new space to ensure connections are compatible with incoming equipment.
  • Identify move route for key equipment, checking door and height/weight clearances.

Day of the Move

  • Chemical movers pack up the chemicals in special containers.
  • General movers pack items not already packed.
  • Freezers are placed on the truck last so they can be unpacked first, positioned and plugged in.

Post-Move Follow Up

  • Tour the vacated lab to ensure all items have been moved.
  • Coordinate the calibration of equipment.

We can’t stress enough how important it is to have a lab relocation specialist working with you to ensure a smooth and trouble-free transition and restart. Using spreadsheets, templates, checklists and other tools, a good lab relocation specialist will create a lab transition plan that will make this complex process as clear, straightforward and incident-free as possible.

Posted on

Laboratory Relocation Tips For Success

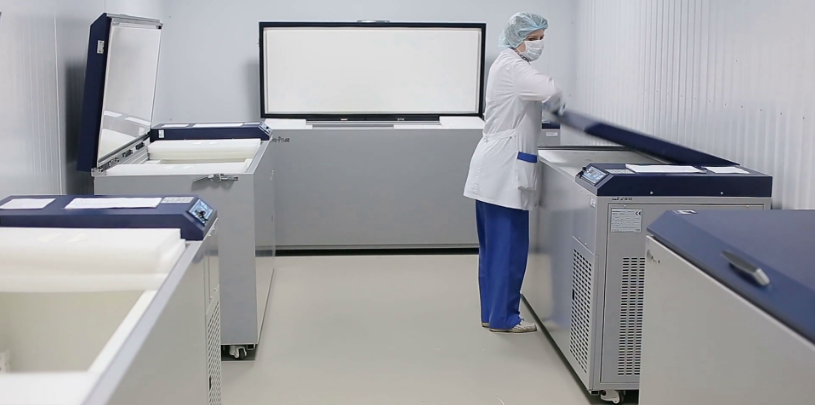
cold storage units and researcher in lab
Whether you’re renovating, consolidating, decommissioning, or expanding your laboratory into a brand new space, use a detailed transition plan to ensure a smooth move and protect your projects. After all, the stakes are high– and missteps have the potential to cause more than temporary inconvenience – so be sure to pay close attention to every detail.

The process can be so complex that some labs hire “transition planners.” Using a set of proprietary templates, checklists, and work plans, these professional planners forecast a timeline for the entire transition, day by day, complete with all the decisions and activities that will need to be made. If you’re anticipating a lab relocation, consider whether or not to hire a transition planner in light of the following points:

Expertise.

Believe it or not, some laboratory transitions take up to six months of planning before a single piece of equipment is moved. With that level of detail to consider, even if you feel you have the resources in-house, you may want to hire an experienced professional planner dedicated to this one task only. This will allow your research staff to continue working on their projects virtually uninterrupted, while your transition planner manages the logistics of the upcoming move.

Experience.

It bears repeating because it’s the most critical thing to account for when managing a laboratory relocation: maintaining the integrity of ongoing research is the most important aspect of any transition. This means your transition planner needs to fully understand the environment your lab is moving into. Where will each piece of equipment be located? Is the proper electrical, mechanical, and plumbing infrastructure in place? If you deal in live specimens, what sort of climate and humidity controls need to be implemented?

The following 10 best practices are highly recommended when transitioning your lab:

Choose Your Internal Team.

It’s likely everyone will play a role, but selecting key people to act as team captains will help keep things on the rails. At your first meeting, identify important dates and a project timeline that you can share with the rest of the staff. Set up regular meetings with your core team so everyone stays informed and any emerging issues can be nipped in the bud before they become problems.

Find a Qualified Equipment Mover.

Don’t rely on regular home or business moving companies to handle your sensitive lab equipment. We don’t have to tell you that these items are delicate and easy to damage. Spend the money and hire someone who specializes in moving lab equipment– the extra investment is well worth it.

Monitor Calibration of Instrumentation.

Talk to your vendors/service contractors to determine under what conditions they will calibrate your equipment after your move. Will they recalibrate or re-certify instrumentation after the move, or does your Agreement with them require that they crate, pack, move and uncrate the equipment in order to maintain your indemnification and guarantee?

Determine Cold Storage Needs.

A regular freezer truck probably isn’t going to do it if you are moving items that require cold storage. Any laboratories contain items, samples, or substances that must be kept in cold storage. Factor in the exact temperature ranges and requirements that the items involved in your research require. Have a back-up freezer on hand the day of the move. Dry ice is also a good idea “just in case.” T

Observe the Chain of Custody.

Do you handle evidence for law-enforcement agencies? Pay particular attention to documenting any chain-of-custody considerations during transport.

Special Permits for Hazardous Materials.

Chances are your lab uses items classified by the Department of Transportation (DOT) as hazardous. Make sure you’re adhering to any legal requirements as well as safety concerns while in transit.

Avoid Cross-Contamination.

Your lab’s reputation is on the line. Take every step to ensure that the outcome of your future research is scientifically valid by being accurate and thorough with every item in your lab. Live animals are a special consideration.

Comply with GMP Requirements.

The need to meet regulatory compliance requirements (especially GLP/GMP guidelines) both before and after relocation– is essential. You will need to fill out and file all the appropriate documentation, which can be extensive– so be sure you do your due diligence very early in the lab relocation process.

Plan Your Route.

You may find that doorways and corridors are not large enough to accommodate bulky lab equipment. Measure equipment and consider your route carefully– find alternatives if you have an issue.

Anticipate Your Needs.

Replacing the benches at your new lab? Make sure they look more than look great. If they won’t bear the weight of tabletop equipment, you’ll have big problems on your hands. How about electric outlets and cord lengths? Again, these issues are easy to address in advance, but very inconvenient the day-of.

The most important thing to remember is that laboratory relocation is never routine. The process is complex and the stakes are high. So whether you hire a transition planner, appoint someone from inside your organization, or take the job on yourself, pay careful attention to the details by using these suggested best practices as your guide!