Posted on

Auto Defrost vs. Manual Defrost Freezers: Which Is Right for Your Lab?

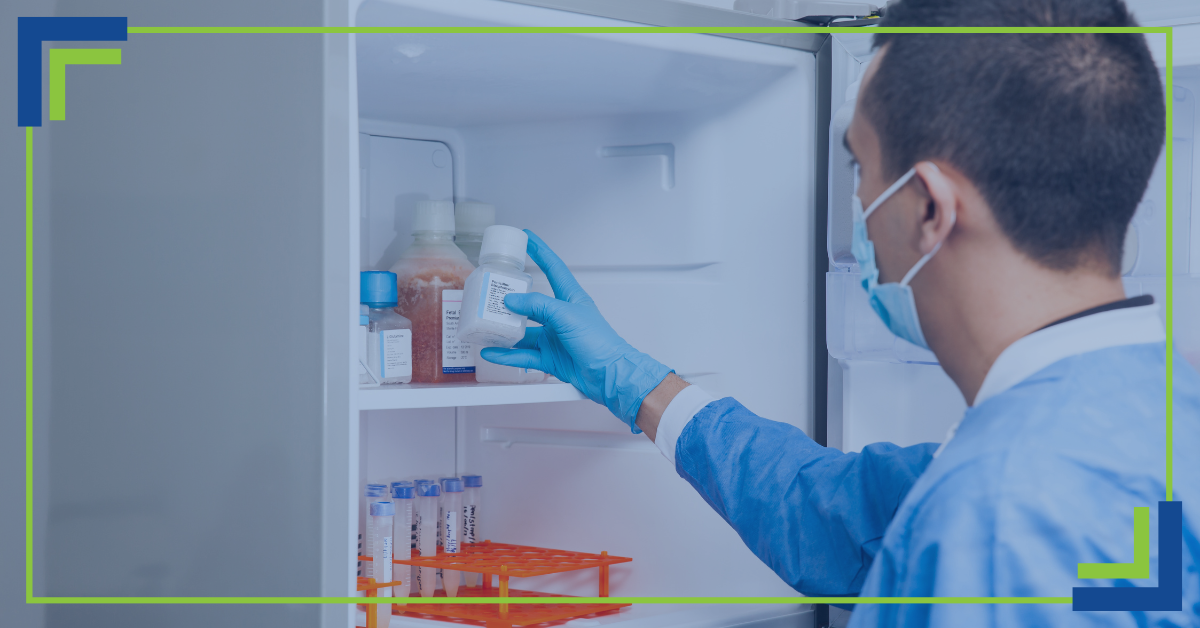
A scientist removing an item from a lab freezer

You open your lab freezer after a scheduled defrost cycle and notice the temperature log shows a two-hour excursion above your acceptable threshold. Downstream, that means a rack of irreplaceable biological samples that may now be compromised, and a lot of difficult conversations ahead.

Defrost type is rarely the first thing labs think about when sourcing a lab freezer, but it should be. Whether you’re storing enzymes, vaccines, cell lines, or reagents, the way your unit manages frost accumulation has direct consequences for sample integrity, workflow, and maintenance burden.

The good news: Both auto and manual defrost systems are used successfully in professional lab settings every day. Neither is universally superior. The right answer depends entirely on what’s inside the unit, how your lab operates, and what level of maintenance your team can support.

How do these systems work? What is a manual defrost freezer? What is an auto defrost freezer? The answers are all below.

How Each System Works

Before you can make the right call, it helps to understand what’s happening inside each type of unit.

Manual Defrost

  • Refrigerant circulates through coils embedded in the cabinet walls.
  • There are no fans or forced air movement.
  • Frost accumulates on wall coils over time.
  • The unit must be taken offline periodically for manual defrost.

Auto Defrost (Forced Air)

  • Evaporator coils sit in an enclosed ceiling housing.
  • Fans circulate cold air throughout the cabinet.
  • A heating element briefly warms the coils on a timed cycle.
  • No manual intervention is required.

Here’s a side-by-side comparison of the core differences:

Feature Manual Defrost Auto Defrost
Air circulation Passive (none) Forced air (fans)
Frost management Periodic manual removal Automated heating cycles
Temperature uniformity Stratified; warmer near top More uniform throughout
Sample desiccation risk Low Higher with open containers
Maintenance labor Required every 3–6 months Minimal ongoing labor
Common  Deep freeze (−20°C and below), sensitive biologics Fridge range (4°C), high-throughput labs

What Is a Manual Defrost Freezer?

A manual defrost freezer, sometimes called a “cold wall” freezer, relies entirely on refrigerant-cooled cabinet walls to maintain temperature. There are no fans or active air movement. Frost builds up on the interior walls over time and must be cleared by taking the unit offline, removing samples to temporary storage, and allowing the ice to thaw. It’s more labor-intensive, but that passivity is part of what makes it well-suited for sensitive storage applications.

What Is an Auto Defrost Freezer?

An auto defrost freezer (also called a “no-frost” or “forced-air” freezer) uses a fan-driven evaporator system combined with a periodic heating cycle to prevent frost from accumulating. The defrost cycles happen automatically, typically on a timer, and don’t require any action from lab staff. This convenience comes with trade-offs that matter more in some storage contexts than others.

The Temperature Stability Question

Temperature stability is the first concern most lab managers raise. The conventional wisdom has been that auto defrost causes dangerous temperature swings. Like most generalizations, this one is partly right and partly outdated.

“Neither defrost system is automatically safer. The quality of the unit and the sensitivity of the samples both matter far more than the defrost type alone.”

Here’s what the data shows: on a quality lab-grade auto defrost unit, sample temperature rise during a defrost cycle is typically minimal, often in the range of 1 to 2°C. That’s a far cry from the dramatic excursions people fear. The reputation largely comes from consumer-grade equipment and older auto defrost units that lacked the insulation, control systems, and cycle management that modern lab-grade units offer.

That said, manual defrost units aren’t immune to temperature events either. Routine door openings introduce warm ambient air, and without forced air circulation to aid recovery, a lab freezer with passive cooling can take significantly longer to return to set-point temperature.

  • Auto defrost concern: Heating cycles introduce periodic temperature fluctuations. In older or consumer-grade units, these can be significant. In modern lab-grade auto defrost equipment, they are typically minimal.
  • Manual defrost concern: Passive cooling means slow recovery after door openings. Warm air enters and the unit lacks the airflow to push it back out quickly.
  • The real question: Which type of temperature event is more likely to affect your specific samples, and which unit’s design will best mitigate it?

Industry data on recovery time comparisons between defrost types consistently reinforces the same takeaway: unit quality and alarm-response systems matter more than defrost type. If your lab doesn’t have a temperature monitoring system and alarm protocol in place that’s a more urgent concern, regardless of which lab refrigerator freezer you’re running.

Choosing by What You Store

Defrost type should be determined by what you’re storing and how you need to store it:

  • Highly sensitive biologics, enzymes, and irreplaceable samples: Manual defrost is the traditional choice and still strongly preferred. Temperature stability is paramount, and the periodic disruption of defrosting is manageable with proper planning. A manual defrost freezer like the VWR MFV-30 is a workhorse in this category for good reason.
  • Vaccines and general reagents at fridge temperature: Either system can work well if the unit is lab-grade. Prioritize alarm systems and temperature logging over defrost type here.
  • Open-container storage or loosely covered samples: Manual defrost is strongly preferred. Air circulation from forced-air systems can desiccate samples stored in open or loosely covered containers over time, a risk that doesn’t exist in a passive cooling environment.
  • High-throughput labs with frequent door openings: Auto defrost may perform better in this situation. Forced air circulation helps the cabinet recover temperature faster after each door-open event, which means cumulative temperature exposure is often lower than it would be with a slow-recovering passive unit.
  • Lab refrigerators at 4°C: Auto defrost is widely accepted at refrigerator temperatures, and units like the Thermo Scientific TSX2305SA are common in this role. The physics of frost formation at 4°C are less aggressive, and the convenience advantage of auto defrost is harder to argue against.
  • Lab freezers at −20°C and below for critical samples: Manual defrost has stronger historical support at deep freeze temperatures. Modern lab-grade auto defrost freezer units narrow that gap considerably, but for truly irreplaceable samples, manual defrost remains the conservative choice.

Maintenance Considerations

Manual Defrost

Expect to take the unit offline for defrosting every 3 to 6 months, depending on usage frequency, ambient humidity, and how often the door is opened. Each defrost event means temporarily relocating samples to backup storage, which itself carries temperature risk if not planned carefully. Labs running manual defrost units should document a defrost schedule, designate backup storage capacity, and ideally have dry ice or a spare unit on standby.

Auto Defrost

No manual intervention is needed. The trade-off is trusting the defrost cycle mechanism to function correctly over time. If the heating element or cycling timer fails, frost can accumulate undetected until it begins affecting temperature performance. Routine preventative maintenance checks from a qualified service technician help catch these issues before they become sample-loss events.

Pro Tip: How Often to Manual Defrost a Freezer

Most manufacturers recommend defrosting when frost buildup reaches approximately a quarter of an inch on the interior walls. At a minimum, it should occur every 3 to 6 months as a scheduled maintenance event. High-humidity environments and units with heavy door traffic will need more frequent attention. Never let frost accumulate past half an inch, as it begins to impair heat transfer efficiency and temperature uniformity.

Quick Reference: Which Should You Choose?

If you want to get straight to the answer for your best situation, here it is:

Storage Scenario Recommended Defrost Type
Sensitive biologics or enzymes Manual defrost
Open containers or loosely covered samples Manual defrost
Vaccines and general reagents (fridge temp) Either, if lab-grade
High-throughput lab, frequent door openings Auto defrost
Lab refrigerator (4°C) Auto defrost generally accepted
Lab freezer (−20°C or lower), critical samples Manual defrost preferred

The Bottom Line

Between the two options, the right choice is always the one that matches your samples, workflow, and capacity for maintenance.

What matters most is buying a lab-grade unit from a reputable manufacturer, pairing it with a temperature monitoring and alarm system, and having a documented protocol for both routine maintenance and emergency response. A well-managed manual defrost unit outperforms a poorly maintained auto defrost unit.

The safest choice is the one you can operate correctly.

Need a Manual or Auto Defrost Lab Freezer?

BaneBio carries quality-tested lab-grade refrigeration, backed by our standard 30-day warranty. Browse the refrigeration catalog or reach out to discuss your specific storage needs. We’re always happy to help you make your lab as effective and efficient as possible.

Posted on

How to Consign, Trade, or Sell Lab Equipment (Step-by-Step)

Decorative graphic that focuses on a microscope in the foreground

Upgrades happen. Grants run out. Research priorities shift. Whatever the reason, labs can accumulate equipment quickly. And suddenly you’re navigating a crowded storage room full of instruments that haven’t run a sample in years. You’re left with two options: Find a way to sell lab equipment you no longer use, or let it take up space and collect dust.

Startling statistic: At any given moment, billions of dollars in idle lab equipment sits unused in research institutions and biotech facilities in the U.S. alone.

There’s good news, though. You have multiple options. Sell it outright, trade it toward equipment you actually need, or consign it through an experienced laboratory equipment supplier. And when you work with BaneBio, all three paths are straightforward. This guide walks you through each option, step by step.

Know Your Options: Sell, Trade, or Consign

Not every situation calls for the same approach. Before you decide how to sell lab equipment, it helps to understand what each option we offer looks like in practice.

Sell Outright

This is the fastest path to cash, ideal for those taking a “see what you can get for it” approach. No longer need the equipment in any capacity? We purchase directly from you, so you receive payment once the deal is finalized. There’s no waiting, listing, or logistics headaches involved.

Trade

Sometimes you need to swap surplus equipment toward something your lab actually requires. Trade value is applied directly to instruments from BaneBio’s extensive inventory, significantly reducing your out-of-pocket cost on upgrades.

Consign

BaneBio lists and sells your equipment on your behalf. This is a strong option for high-value items and/or flexible timelines. You benefit from a win-win situation by taking advantage of our buyer network without having to manage the sale yourself.

Quick Comparison

Option Speed Your Effort Payout Type
Sell Fast Low Immediate cash
Trade Fast Low Equipment credit
Consign Variable Minimal Higher return potential

Step 1: Take Stock of What You Have

Before reaching out to us, do an inventory of your surplus. It doesn’t need to be exhaustive, but the more detail you can provide upfront the smoother the evaluation process will be.

For each item, there are some key notes you should take:

  • Make and model number
  • General condition (functional, powers on, cosmetic damage, etc.)
  • Accessories or components included (rotors, probes, software dongles, manuals)
  • Any known issues or missing parts

Pro Tip: Don’t assume something is too old or too niche to have value. BaneBio works with a broad buyer network and has customers for a wide range of equipment across dozens of instrument categories.

Step 2: Request a Quote from BaneBio

Once you have a sense of your inventory, submit your list on our website. The process is designed to be simple, with no obligation or pressure.

What to include in your submission:

  • Photos: clear images of the instrument, including serial number plates and any visible wear
  • Model numbers: found on the instrument itself or in original documentation
  • General condition: operational status, recent service history if available
  • Accessories included: list any rotors, probes, adapters, or software that comes with the instrument

After you submit, our team evaluates the equipment and responds with an offer or a set of options tailored to your situation. You’re under no obligation to proceed. This is simply a starting point for the conversation.

Step 3: Review Your Offer and Choose Your Path

Once we have assessed your equipment, we’ll walk you through your options, whether that means a direct purchase offer, trade credit toward used lab equipment for sale in our inventory, or a consignment arrangement.

As you evaluate the offer, consider:

  • Timeline: Do you need funds quickly, or is a longer consignment window acceptable?
  • Budget needs: Is cash the priority, or would trade credit toward an upgrade be better for your situation?
  • Reinvestment plans: Are you actively looking to replace or supplement existing instruments? Our inventory includes centrifuges, analytical equipment, environmental chambers, microscopes, PCR systems, and much more.

There’s no universal right answer, because every lab’s needs are unique. A lab shutting down a redundant workflow has different priorities than one funding an equipment upgrade through surplus sales. Our team can help you think through the trade-offs.

Step 4: Logistics Made Easy

One of the most underappreciated parts of deciding to sell lab equipment is what comes after the deal is agreed upon: getting the equipment out of your facility safely. This is where things can get complicated if you’re not working with a laboratory equipment supplier that handles logistics in-house.

The BaneBio Lab Logistics team manages the entire removal process:

  • Scheduled pickup coordinated around your facility’s availability
  • Professional packing and transport
  • Custom, scientific-packaging available for fragile, high-value, or oversized instruments
  • Experienced handling of large and complex equipment that standard couriers simply aren’t equipped for

Why Does This Matter?

Scientific instruments require careful decommissioning, proper packaging, and appropriate transport. Damage during removal or shipping can affect both the instrument’s value and your facility. Our Lab Logistics team is trained specifically for this kind of work.

Step 5: Get Paid (or Upgraded)

The final step looks a little different depending on which path you chose. Here’s what to expect once logistics are complete:

If You Sold

Payment is issued once the deal is finalized and the equipment is received. It’s a clean and straightforward process.

If You Traded

Your trade value is applied toward equipment from our inventory. You leave with instruments your lab can actually use, as well as a reduced out-of-pocket cost on the upgrade.

If You Consigned

We list and manage the sale for you, and payment is issued once your item sells. We’ll handle the transaction, buyer communication, and all related logistics. If you’re looking for used lab equipment for sale in the meantime, your trade credit can be applied here.

Special Situation: Full Lab Closures

If your lab is shutting down entirely, the situation changes significantly. Piecemeal selling is time-consuming and rarely maximizes recovery value. To properly handle an “everything must go” situation, expertise is needed.

We offer comprehensive Lab Closure services for this very scenario:

  • A single point of contact to assess, catalog, and value everything at once
  • Removal of all equipment, regardless of size
  • Buyer sourcing across our established network of customers
  • Significant reduction in administrative burden versus managing individual sales

For labs facing a full closure, working with a trusted laboratory equipment supplier that can handle the entire process is far less stressful. On top of that, it’s generally more financially productive than managing it independently.

A Stressless Way to Sell Lab Equipment

Whether you’re clearing out a single surplus instrument or winding down an entire facility, the decision to sell lab equipment doesn’t have to be complicated. Sell, trade, or consign. BaneBio makes all three options achievable, and our team handles the parts that would otherwise create friction: valuation, logistics, packaging, and buyer matching.

Labs that have worked with us consistently point to the same advantages: a broad and well-maintained inventory of used lab equipment for sale, professional service, and a team that understands scientific equipment.

Ready to Get Started?

If you have an equipment list ready, you can submit it here and our team will get to work evaluating it. Let’s let your equipment keep serving science.

Posted on

UV-Vis Spectrophotometer: The Basics Every Lab Technician Should Know

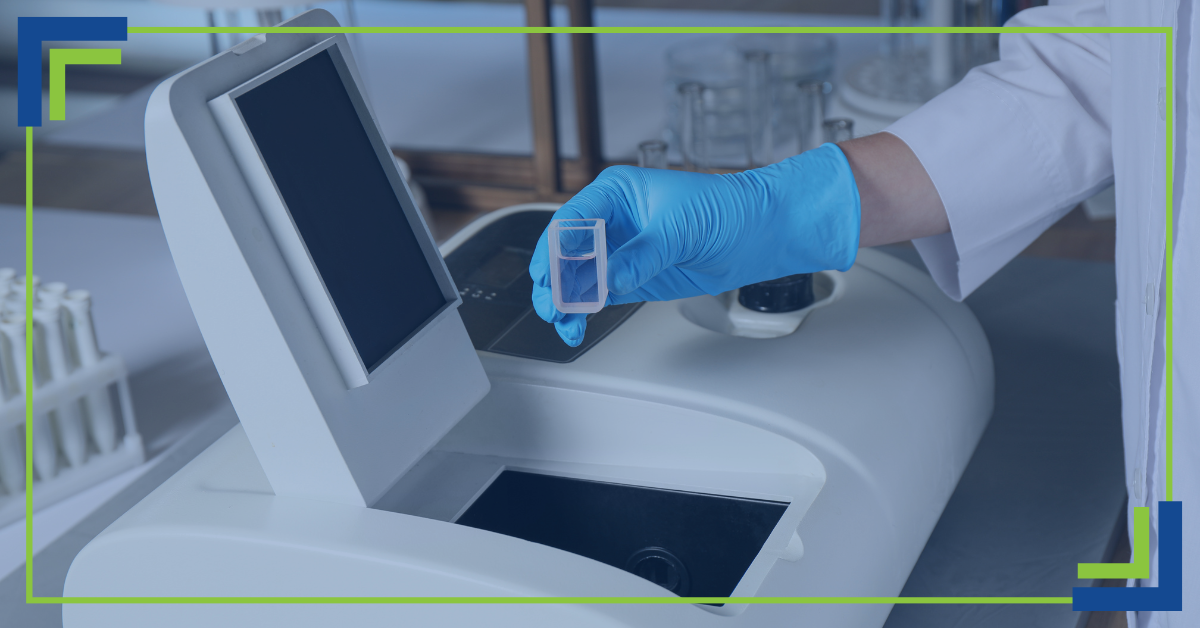
A scientist using a UV-Vis spectrophotometer

The UV-Vis spectrophotometer is one of the most widely used analytical tools in modern labs, and for good reason. It provides fast and accurate means of characterizing samples, confirming concentrations, and tracking reactions in real-time. Whether you’re working in pharmaceutical research, environmental testing, or biotech, this is an instrument your lab needs to have on hand.

This guide aims to cover everything you need to know about this versatile and essential laboratory tool.

What Is UV-Vis Spectrophotometry?

Before understanding the device itself, we need to understand the process it facilitates. UV-Vis spectrophotometry measures the amount of ultraviolet (UV) and visible light different substances absorb; different molecules absorb light at different wavelengths, and the degree of absorption at a given wavelength provides insights into the nature and quantity of a substance.

The process is governed by the Beer-Lambert Law, which states that absorbance is directly proportional to both the concentration of the absorbing material and the path-length of light through the sample. It’s expressed as:

A = εcl

Where:

  • A = absorbance
  • ε = molar absorptivity (a constant specific to the substance)
  • c = concentration
  • l = path-length

Understanding the process and the law that governs it is fundamental to interpreting the data your spectrophotometer generates.

Key Components of a UV-Vis Spectrophotometer

So how does a spectrophotometer work from a mechanical standpoint? Let’s take a look at its primary components and how they work together.

  • Light Source: For UV range, instruments use a deuterium lamp. For visible range, a tungsten-halogen lamp is utilized, though certain modern models integrate both into a single source. The light source provides the broad-spectrum beam needed to make the measurement.
  • Monochromator: This isolates wavelengths from the broad light source through a prism or diffraction grating. With this, only the desired wavelength (or narrow band of wavelengths) is directed toward the sample. 
  • Sample Holder (Cuvette): This is made from glass, disposable plastic, or quartz (for UV measurements). The cuvette is housed in a sample compartment that the selected wavelength passes through.
  • Detector: After passing through the sample, it is measured by a photodetector and converted to an electrical signal.
  • Data Display: The electrical signal is processed and displayed as one of three kinds of data: absorbance, transmittance, or concentration. Recent models integrate with software that allows the user to log data as well as perform spectral scanning, method storage, and report generation.

Common Laboratory Applications

What does a spectrophotometer measure in a real-world lab setting? Let’s take a look at its applications.

Measuring Sample Concentration

Technicians can determine the precise concentration of virtually any light-absorbing compound, from dyes and pigments to active pharmaceutical ingredients. This is one of the most routine uses of the instrument in quality control and R&D labs.

Monitoring Chemical Reactions

The UV-Vis spectrophotometer is an excellent tool for tracking reaction kinetics. Enzyme assays, for example, are frequently monitored this way in biochemistry labs.

Protein and DNA Quantification

Biological labs rely heavily on UV-Vis measurements for nucleic acid and protein analysis. According to a survey by the American Laboratory community, quantification of biomolecules remains one of the top five most common uses of UV-Vis spectrophotometry in life science research.

Environmental and Pharmaceutical Testing

Regulatory agencies require rigorous testing of water quality, pollutants, and pharmaceutical compounds. The UV-Vis spectrophotometer is a go-to instrument for such compliance-driven testing.

Basic Steps for Running a UV-Vis Measurement

Even if you’re an experienced laboratory technician, it’s good to revisit workflow fundamentals (especially if you don’t use this equipment on a daily basis). The standard workflow for running a UV-Vis measurement includes:

  • Prepare and dilute the sample: Make sure your sample falls within the range of the Beer-Lambert Law. Dilute it with an appropriate solvent and record the dilution factor so you can use it in your calculations.
  • Select the correct wavelength: Set the device to the wavelength of maximum absorbance. If you aren’t sure what that is, run a spectral scan to determine the absorbance peak.
  • Calibrate with a blank sample: Fill a cuvette with your solvent or buffer and use it to zero the instrument. This process ensures that only your analyte is being measured.
  • Measure absorbance or transmittance: Insert the cuvette into the device and record the absorbance or transmittance value displayed on the interface.
  • Record and analyze results: Apply the Beer-Lambert equation or refer to your calibration curve to convert absorbance into concentration. Document all conditions for traceability and reproducibility.

Best Practices for Accurate Results

Even a top-of-the-line spectrophotometer will underperform if you don’t adhere to basic handling practices. The following tips will help you attain reliable data:

  • Keep cuvettes clean: Fingerprints, smudges, and residue on the optical surface scatter light and introduce error. Ensure you handle cuvettes by their frosted sides and rinse thoroughly between samples.
  • Avoid air bubbles: If there are bubbles in the path of the light, you may get significant absorbance artifacts. Make sure you de-gas or gently tap to remove bubbles before taking measurements.
  • Warm up your instrument: 15–30 minutes of warm-up time is typically required to achieve a stable output.
  • Calibrate frequently: Routinely re-zero using a fresh blank, especially when changing multiple matrices. If you’re running critical applications, run check-standards at the start and end of a session.
  • Maintain consistent sample preparation: Variations in solvent, pH, temperature, or mixing can all shift absorbance values. Standardizing (and consistently following) your sample prep protocol will help you reduce run-to-run variability.
  • Check your cuvettes for compatibility: If your UV measurements are below 340 nm, avoid using plastic cuvettes. Instead, use quartz to avoid artificially high absorbance readings.

Find the Right UV-Vis Spectrophotometer at BaneBio

What does a spectrophotometer measure? It ultimately comes down to one thing: light, and what happens to it when it passes through your sample. The long-term value of that measurement is what makes a UV-Vis spectrophotometer the powerhouse of lab equipment that it is. That said, only a deep understanding of the equipment and processes will allow you to unlock its full research potential.

At BaneBio, we understand that access to reliable, well-maintained analytical equipment is essential to doing good science. That’s why we offer a carefully quality-tested inventory of new and pre-owned UV-Vis spectrophotometers. Reach out to us or browse our inventory to find the right equipment for your scientific needs!

Posted on

Biotech & Biopharma: Understanding the Key Differences

Male and female scientist looking through a microscope.

It’s an easy trap to fall into: using biotech and biopharma interchangeably. But while they share plenty of similarities, there are some major distinctions you should be aware of. Whether you’re a patient trying to understand a treatment or a scientist planning a lab, it’s vital to know the ins and outs, and that includes the major unique traits of each discipline.

With such knowledge, you can understand how new scientific discoveries can transform into real life therapies and treatments. It also shines a light on how scientific innovation moves from research benches to large manufacturing operations. Let’s dive in.

What Is Biotechnology?

This specific field focuses on the use of biological systems, organisms, and processes. These all come together to develop products and tech with the goal of improving human life and solving complex scientific problems. 

In the worlds of healthcare and life sciences, biotech companies generally have a focus on early-stage research and discovery in areas like:

  • Genetic engineering
  • Cell and gene therapy research
  • Molecular diagnostics
  • Lab-based innovation

Biotech’s reach isn’t just limited to medicine, however. It plays a huge role in agricultural advancements, biofuels, and various industrial processes.

What Is Biopharma?

Companies in this field focus on developing and commercializing drugs that are created from biological sources. Biotechnology may be involved in the tools and discoveries, but when their job is complete, it’s up to biopharma entities to turn all of that into approved treatments that reach patients.

Biopharmaceutical companies generally work in these fields:

  • Biologistics
  • Vaccines
  • Therapeutic proteins
  • Monoclonal antibodies
  • Advanced therapies

Their products are produced using living cells and in-depth biological processes. As a result, they heavily invest in manufacturing infrastructure, quality control systems, and regulatory compliance.

Biotech vs. Biopharma: Key Differences

These two major scientific disciplines share similar roots, but there are plenty of distinguishing factors: even beyond what we’ve already discussed. It’s best to identify these differences from a high level, so here are the key things that set them apart from one another:

Focus and Scope

  • Biotechnology companies focus on research, discovery, and proof-of-concept work.
  • Biopharmaceutical companies focus on clinical development, manufacturing, and commercialization.

Research and Production

  • Biotechnology companies do most of their work in research labs.
  • Biopharmaceutical companies handle production and distribution outside of the lab.

Regulatory Pathways and Timelines

  • Biotechnology projects often take place before clinical trials are conducted.
  • Biopharmaceutical development is subject to prolonged regulatory reviews that include multiple trials and extensive safety documentation.

Company Size and Funding

  • Biotechnology firms are usually small startups that are funded by grants or venture capital.
  • Biopharmaceutical companies are generally larger entities that are publicly traded.

Where Biotech and Biopharma Overlap

Of course, not everything about these two fields is exclusive; there are plenty of areas where they overlap. They both rely on the scientific foundation of molecular biology, genomics, and bioengineering. Despite the operational differences these fields see, collaborative partnerships can accelerate timelines. The goal of both fields is very similar, if not the same: getting treatments to patients.

There’s also a need for shared laboratories in some cases, specifically as innovations transfer from small projects to large manufacturing and operational environments.

Why the Distinction Matters

The comparisons between these two fields vary widely, from close overlap to wildly differing distinctions. Understanding biotech vs. biopharma carries implications all across the life sciences ecosystem.

Depending on the stakeholders, the distinction matters in plenty of ways, such as:

  • Patients: Helps them understand how treatments and therapies are discovered, tested, and delivered.
  • Professionals: Lets them know the focus of roles—research or manufacturing and compliance.
  • Investors: Outlines the differences in risk, timelines, and potential for growth.
  • Laboratory Planners: Has an impact on lab designs, equipment needed, and operation scalability.

Biotech labs usually necessitate flexible setups that can adapt to various experimentation processes. On the other hand, biopharma facilities place more emphasis on consistency, compliance, and production capabilities.

The Best Tools for Research

Biotech and biopharma are closely linked; there’s no denying that. However, they each play their own distinct roles within life sciences. While one maintains a heavy focus on discovery and innovation, the other works to ensure those discoveries are transformed into products that will enhance the lives of patients and the state of science overall.

These sectors work together to fuel crucial advancements that are necessary to move us forward. Medicine, diagnostics, and therapeutics wouldn’t be nearly as advanced as they are today without biotech and biopharmaceuticals. Understanding their differences, as well as why they need to work together, helps professionals, patients, and investors make informed decisions.

If you’re working in these industries and need to stock up on equipment, BaneBio is the place to do it. We aren’t recognized as the scientific supermarket for nothing! Browse our products, sell equipment you’ve outgrown, or inquire about our lab logistics services. Whatever we can provide you with to help you move science forward, we’re on top of it!