Posted on

Top 5 Cold Storage Unit Best Practices

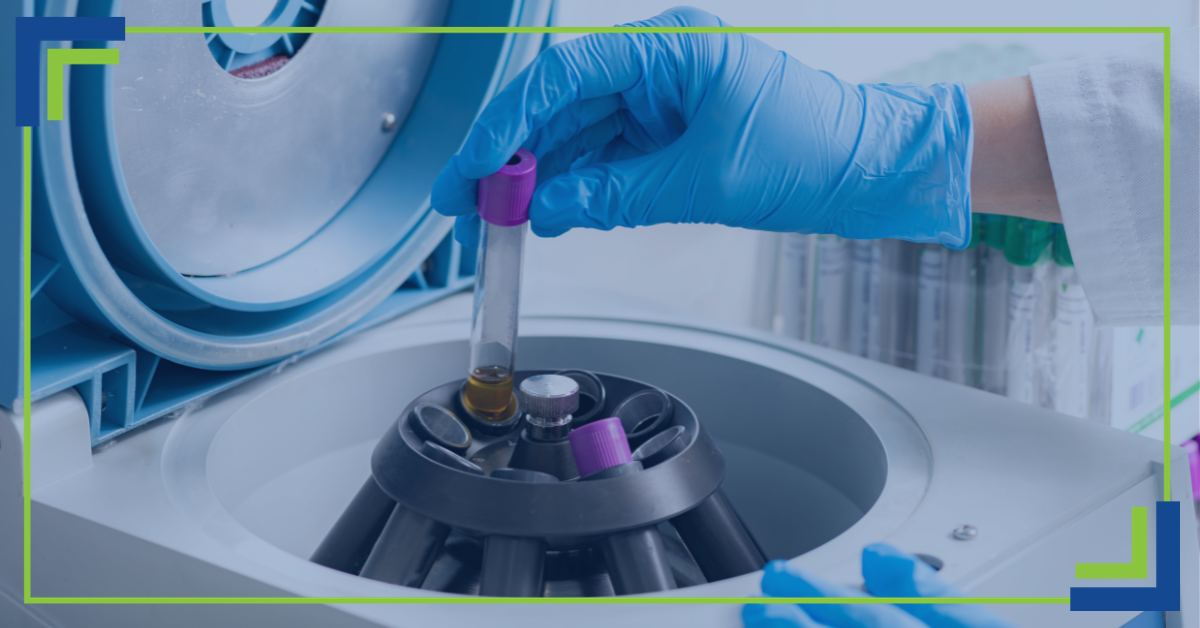
Scientist handling cold storage unit

Your cold storage units are the unsung heroes in your lab. They’re the pieces of equipment you never think about until they stop working.

Here are five best practices for your cold storage units:

1. Make Sure The Cold Storage Unit is Evenly Stocked

An improperly stocked freezer is prone to extreme temperature shifts when the doors are opened. A good rule of thumb is to try to keep the equipment at least 30% full if possible. If this isn’t possible, add a few gel packs or sealed water bottles to keep the temperatures consistent.

Conversely, don’t overstock your cold storage. Not only will this block airflow inside the unit, it will cause your staff to keep the doors open longer searching for items. 

Avoid stocking materials that are extremely sensitive to temperature fluctuations on the top or bottom shelf of the unit. Instead, place them on the middle shelves of the unit to help them maintain a steady temperature.

2. Keep Your Cold Storage Equipment Cleaned and Sanitized

The best way to discourage bacterial contamination in your cold storage units is to make sure they are regularly cleaned and disinfected. A soft rag and a neutral cleaner is best for this task.

If possible, remove shelves and wipe them down, allowing them to dry completely before returning them to the unit. Clean both the interior and the exterior of the unit, paying attention to the coils as well.

To properly clean the condenser coils, use a vacuum, air jet, or a dry brush. Clean coils keep the heat exchanger working optimally, increasing the lifespan of the equipment while reducing its energy usage.

Never use bleach or harsh disinfectants that could potentially harm your equipment.

3. Frost Control

While no laboratory wants to place a cold storage unit out of service, it’s necessary to schedule a defrost at least once per year, or whenever the frost is more than one centimeter thick. This increases the unit’s energy efficiency and ensures an even temperature. Use this time to check all gaskets and door seals to make sure they’re still sealing properly.

4. Labels Facing Out

Position all items in cold storage with the labels facing out to ensure staff can quickly find what they’re looking for. This helps reduce the amount of time the unit’s doors are open. Discourage random repositioning of stored items. Your lab may even benefit from a spreadsheet that outlines where items are stored in the unit.

5. Replace Cold Storage Units In Time

As cold storage units age, they’ll become increasingly unreliable and consume more energy. You may find your lab is frequently repairing older units. As a rule, the average lifespan of a cold storage unit is twelve to fifteen years. If your equipment is nearing its end of life, consider purchasing a new one or replacing it with a newer used one.

BaneBio is Your Partner for New and Used Cold Storage Equipment

If it’s time to replace your lab freezer or refrigerator, BaneBio has the products you need. Whether you’re looking at a new piece or a certified used piece, browse our products and find your perfect replacement. We accept trade-ins and purchase used lab equipment as well. Reach out to us and learn more!

Posted on

Depot Repair: Small Laboratory Equipment Repair Made Easy

back of female scientist working in lab

If your large equipment fails, field repair services are the perfect solution to keep your lab running smoothly. If your smaller equipment fails, however, depot repair may be your best option.

What is Depot Repair?

Depot repair involves packaging and shipping laboratory equipment to a qualified biomedical equipment technician for repair, calibration, or preventive maintenance. Once the services are complete, the equipment is returned to your lab for immediate use.

When smaller equipment needs maintenance or repairs, outsourcing services provides the fastest, most economical solutions your lab needs to stay productive.

Why is Depot Repair the Best Choice for Your Small Lab Equipment?

Choosing a qualified laboratory equipment depot repair provider ensures professional services from a team of highly qualified and skilled biomedical technicians. 

What does depot repair mean for your lab?

Streamlined Lab Equipment Repairs and Maintenance

Rather than waiting for field repair technicians to come to you, depot repairs can begin as soon as your equipment is received. Once the services are completed, the equipment is shipped back to your facility for immediate use. There is no middle-man involved; the best laboratory equipment repair facilities will perform these services in-house.

Your repaired equipment will be returned with detailed documentation for your records of the services performed. Many depot repair facilities offer equipment rentals or temporary replacement of equipment that requires extensive repairs.

Depot Repair Saves Money on Laboratory Equipment Servicing

From storing broken equipment to lost productivity and the costs of bringing an on-site technician to your facility for repairs, lab equipment repair can take a bite out of a lab’s budget

Depot repair saves money by eliminating an on-site repair fee. It also allows equipment to be sent out immediately rather than being stored somewhere awaiting repairs.

Increase Your Lab Equipment’s Longevity and Performance

Depot repair services cover more than just fixing broken or failing equipment. Creating a schedule to send your smaller lab equipment out for routine preventive maintenance is a great way to stay on top of manufacturer’s recommendations and ensure your equipment is working optimally.

BaneBio: Depot Repair Services Maryland Labs Rely On

BaneBio offers depot repair for smaller lab instruments that can be properly packaged and shipped. Our in-house equipment service facility will professionally repair your equipment and return it to you quickly, cutting down on lost productivity in your lab. 

Microfuge or other equipment on the fritz? Contact BaneBio for a no obligation assessment and recommendation.

Posted on

How to Determine & Maintain a Laboratory Budget

woman researcher looking through microscope

Whether you’re starting up a new lab or looking to improve or make budget cuts to an existing one, determining and maintaining a laboratory budget is the most important “next step” to take. Underfunded and understaffed; where do you start? Here’s a look at some helpful tips for creating a laboratory budget that you and your techs can live with.

Don’t Just Jump Into Buying Major Equipment

You may be tempted to start purchasing major equipment right away, but the secret to determining and maintaining your laboratory budget is understanding what you “need” and what’s “nice to have.” 

  1. Split your equipment list into several categories, including essential, ancillary, and wishlist. 
  • Essential equipment includes the tools you need to store and test your samples, such as refrigerators, microscopes, and centrifuges.
  • Ancillary equipment is also necessary to support your essential equipment. This list includes tubes, beakers, chemical reagents, and pipettes.
  • Wishlist: This is equipment that you need in the future, although for now you can borrow the equipment from a shared facility.
  1. Don’t forget that common equipment, such as refrigerators or appliances, as well as some supplies including paper towels and cleaning solutions are available at lower prices at some of the big box stores.
  1. Buying used lab equipment is a great way to save money on your lab budget. You can also ask for donations of equipment from other laboratories or partnering labs within your facility.
  1. Always look into purchasing the extended warranties and protections on your equipment to save money on repair or replacement.
  1. Preventive maintenance is a key factor in keeping your existing equipment running efficiently. 

Ongoing Costs

Once your initial setup is complete, it’s time to consider what consumables you will be using monthly. Your employees and team members will have a better idea of how many supplies they use monthly, so their input is a valuable resource.

It may take you a month or two to get the most accurate picture, but it’s estimated that an average sized lab will spend around $1000 a month on supplies such as pipettes, gloves, tubes, and slides. Next estimate how many antibodies, enzymes, and testing kits you will need to operate and add this into your basic recurring lab supply cost. Now add the cost of cleaning and maintenance supplies, as well as utility bills and rent or mortgage.

Lastly, look at your personnel spend (salaries, benefits, vacation, and sick days) and add that into the ongoing cost list.

Don’t Be Afraid to Make a Change

When balancing your laboratory budget, you may need to switch suppliers to ensure you are getting the lowest prices on your equipment and supplies. If you’re comfortable with the quality of supplies you are getting from your current supplier, don’t hesitate to reach out and try to negotiate a better price.

Be aware that not all suppliers have the same brands and not all brands are equal. Do a little legwork and research reviews on unfamiliar brands and suppliers before partnering with a new one.

Hiring Personnel is One of The Biggest Laboratory Spends 

By far, hiring and retaining qualified lab personnel is one of the biggest laboratory budget expenditures your lab manager will face. Here are a few ways to keep this spend down a little.

Make your lab environment inviting: Not just the lab facilities, but in the job culture. People are willing to take a little less money in salary if they truly love their jobs.

Provide educational and advancement opportunities: You can decrease turnover in your laboratory by providing continuing education and opportunities to advance. You can add a caveat, such as the minimum amount of time an employee must work to qualify for these perks, or negotiating how much time they will need to spend with your organization if they take advantage of educational opportunities.

Go shopping for eager students: Undergraduate and postgraduate students interested in the sciences can provide much of the help you need in the lab. These students can work as assistants in any number of departments. You may be able to contact universities and see if you can offer credit to student volunteers.

Offer great benefits: Circling back to the happy employee, offering great benefits is a way to make the job more inviting when you can’t pay candidates quite as much as a competitor could. A generous vacation policy, affordable health benefits, buy-in retirement plans, or even stock options can be used as leverage for your potential candidates. The costs of these benefits will be far less than the costs of high-turnover rates such as constantly training and equipping new employees.

Determining and Maintaining a Laboratory Budget: Keeping the Records

Now that you’ve created a basic guideline for creating your laboratory budget, it’s time to put it altogether. Excel spreadsheets are one option, but they can be cumbersome and confusing.

Many labs turn to solutions such as Quicken, QuickBooks, and other online budget software.

Once you’ve determined your budget, inform your teams of how it will affect them. Ultimately, it will be a shared responsibility to maintain the laboratory budget.

BaneBio has ways to keep your laboratory running within budget, from used equipment to cost- saving preventive maintenance contracts and repair services. Contact us today and let us show you how we can keep your operations running efficiently and economically.

Posted on

Laboratory Pack-up & Relocation – Everything You Need To Know, Part 1

technician working in lab

When It’s Time to Move Your Lab

There’s no getting around it: moving a laboratory is a complex process that involves meticulous attention to detail, making it a stressful experience for all concerned. The actual move date will likely be preceded by 4–6 months of careful planning, even if you follow most lab managers’ recommendation that you hire an experienced lab relocation specialist. Outsourcing the project to a lab relocation specialist will minimize the move’s impact on your operation’s scientific mission and productivity.

Moving usually signals that new and exciting opportunities are ahead for a company, but it’s still critically important to plan correctly and take into account all aspects of the experience. For example, although it is important to plan out the logistics of the physical move, it is also important to take into account its emotional impact. A relocation is not only disruptive to the physical plant, but the introduction of a lab relocation specialist will change the dynamics of the organization. A good lab relocation manager will take the time to establish trust and respect with your entire team, and foster productive, collaborative relationships between his move team and your technicians, administrative personnel, and lab leads.

Make keeping everyone informed a top priority. So they can plan accordingly, your team will want to know not just the date for the move itself, but also when the equipment they use will no longer be available. Remember to talk to the facilities manager in the building you are vacating and your contact in the building you are moving into as soon as possible. These individuals will oversee everything from the disconnection and connection of your utilities to the availability of packing/unpacking areas and loading docks.

Every lab relocation is different with different priorities and steps needed to ensure a smooth and seamless transition. However, establishing a timeline is will help keep the process on track:

Two to Three Months Before the Move

  • Tour existing and new lab space with your lab transition planner and your architect.
  • Develop equipment binders and review responsibility matrix.
  • Dispose of old files, old chemicals, and old samples.
  • Notify vendors, the mail room, and other relevant parties that the lab has relocated.
  • Secure keys and access to the new space.
  • Identify who will pack the equipment and move it.
  • Set a start date and time-frame.
  • Establish a timeline to shut down certain pieces to prepare for move.
  • Send out RFP for specialist movers (chemical, equipment).

Two to Three Weeks Before the Move

  • Have boxes, tags, and other materials delivered to the lab so that packing can begin
  • Begin labeling each piece of equipment with a separate label that includes the name of the lab, the phase of the move in which it should be handled, and where it should be placed in the new lab.
  • Tour the new space to ensure connections are compatible with incoming equipment.
  • Identify move route for key equipment, checking door and height/weight clearances.

Day of the Move

  • Chemical movers pack up the chemicals in special containers.
  • General movers pack items not already packed.
  • Freezers are placed on the truck last so they can be unpacked first, positioned and plugged in.

Post-Move Follow Up

  • Tour the vacated lab to ensure all items have been moved.
  • Coordinate the calibration of equipment.

We can’t stress enough how important it is to have a lab relocation specialist working with you to ensure a smooth and trouble-free transition and restart. Using spreadsheets, templates, checklists and other tools, a good lab relocation specialist will create a lab transition plan that will make this complex process as clear, straightforward and incident-free as possible.

Posted on

Choosing the Right Incubator for Your Lab

The CO2 incubator is a critical piece of lab equipment designed to create and reliably maintain a sterile, pH-optimized, humidified, in vitro environment for the culture of living tissues or cells. 

There are two main types of incubators: direct heat and water jacket. In order to determine which type of incubator best suits your needs, it’s important to review and evaluate the advantages and drawbacks of each. Because different cell types respond differently to temperature fluctuations, hypoxia, and vibrations, it is also critical to review your choices of incubator in light of which types of cells you plan to incubate, and where you plan to place the incubator within your lab. 

Once you have determined the ideal living conditions for your cells, and where the incubator will be placed within your lab, use the five considerations below to choose the right incubator for your needs:  

Know the advantages and drawbacks of direct heat vs. water jacket incubators.
A water jacket incubator has a water-filled layer, or “jacket”, surrounding the growth chamber. The water within the jacket circulates, creating a relatively uniform interior temperature and thermal buffer against outside air fluctuations. Because water jacket incubators can hold heat up to five times longer than direct heat units, they are especially advantageous in the event of a power outage. A water jacket also reduces vibrations, which is valuable when you are working with sensitive cells. 

Keep in mind, however, that water jacket incubators are very heavy when filled, and can take up to 24 hours to reach a stable operating temperature. Also, because they are not designed to operate at temperatures high enough to sterilize or decontaminate, gas decontamination may be required.

Like water jacket units, direct heat incubators also heat the inner chamber through conduction; however the inner walls of the unit have direct contact with heating coils instead of the water jacket. This results in more rapid temperature changes. Rather than the 24 hours a water-jacket unit takes to reach required temperature, setup of a direct heat incubator takes only eight hours. Its heating coils can also reach temperatures to sufficiently sterilize and decontaminate. 

On the other hand, because the direct heat incubator’s heating coils have very specific contact points on the inner walls, the inner chambers of this type of incubator are less uniformly heated and are more susceptible to changing ambient air temperature and temperature fluctuations. When temperature stability is critical, a water jacket incubator may be more suitable for your needs.

Determine where within the lab the incubator will be located.
Because the environment that surrounds the incubator affects the way it functions, determining where the unit will be located is important before you make a decision. A water jacket incubator works best in a “hot spot” or if the ambient temperature of the lab changes frequently. The water conduction system is significantly more resistant to external temperature changes than are the coils of a direct heat incubator. If the incubator is to be placed near equipment that vibrates heavily such as a centrifuge, a water jacket unit will minimize this movement. 

Assess the humidity controls of the incubator.
The ability to maintain the ideal humidity within the incubator is critical because it prevents evaporation from the cell culture. When water evaporates from the media, the concentration of amino acids, salts, and metabolites spikes, causing osmotic pressure to rise and subsequent damage to cells. Regulating the amount and type of airflow that occurs within the chamber also affects the rate of evaporation. Some incubators have introduced systems to slow the airflow to minimize evaporation and avoid drying out cell cultures. When comparing incubators based on this feature, look for the number of air exchanges over time within the inner chamber.

Decide if hypoxic control is necessary and determine accuracy of gas sensors.
Preserving a healthy level of carbon dioxide within an incubator is important because the interaction of CO2 with the cell culture media determines the media’s pH. Many incubators use conventional thermal conductivity (TC) sensors, but newer models rely on a type of infrared (IR) sensor that is less sensitive to chamber humidity and temperature. 

Oxygen levels can also have drastic effects on the growth of some cultures such as stem cells or primary tissues. An incubator with O2 controls uses nitrogen gas to lower the concentration of O2 within the growth chamber. Evaluating the need in your lab for this type of gas control measure is an important consideration when purchasing an incubator.

Consider options for constant contamination control.
Contaminants can be entered into the incubator simply by opening the door. When an incubator is maintained with positive pressure within the growth chamber, airflow into the chamber is minimized—preventing airborne contamination. Internal air is then forced through a HEPA filter to provide an extra layer of sterilization. 

Note that a HEPA filter installed inside the growth chamber can be problematic, especially if the blower’s motor stops, causing contaminants from the filter to fall on your cultures. Consider an externally mounted HEPA filter for easier service and repair, and to protect cells from potential contaminants. If sterility of cultures is a top priority, be especially mindful of an incubator’s contamination controls prior to purchase. 

A well-designed, properly functioning laboratory often includes incubators to keep cells growing well and protected from contaminants. Taking the time to assess your needs in light of these five considerations will help you make an appropriate choice.

Posted on

How To Choose the Right Medical Freezer

When you work in a field where consistency and accuracy are the foundation for meaningful results, it’s crucial to have the right tools for every task. Your equipment needs to do precisely what you need it to do the first time, every time, so that you and your staff are free to focus on your work with confidence.

So when it comes to buying a new freezer for your lab, finding a model that both meets your needs and provides consistent performance is crucial. And no matter how meticulously you have shopped for a household appliance in the past, finding the best commercial grade medical freezer is far more complicated. Specific requirements of commercial laboratory freezers include the abilities to:

  • Maintain a specific temperature consistently.
  • Reach an especially cold temperature in order to keep specific types of medical and laboratory samples fresh.
  • Tell users when the freezer temperature falls out of acceptable range.
  • Provide reliable durability to avoid the costs and consequences of ruined samples or medications.

Because an industrial freezer in a research laboratory or medical practice must meet more stringent requirements, expect the cost to reflect that. The cost is high but what’s at stake— including the accuracy of your results and potential damage to your lab’s good reputation— is far higher. So before you start shopping, review our Guide to get a solid idea of the options that should factor in to your decision about which industrial freezer to buy for your lab, pharmacy, or research facility.

Common Uses for Medical Freezers

A finely calibrated, high quality freezer for your healthcare facility, medical practice, pharmacy, or research laboratory will have specialized features that ensure that sensitive items remain viable including:

  • Vaccines, which must be stored according to CDC guidelines
  • Medications that require a consistent temperature for storage.
  • Chemicals that may be either ruined or compromised if not stored within a specific temperature range.
  • Medical laboratory samples and donations, such as blood, plasma, and bone marrow.
  • Sensitive research samples and material, such as biological research samples of tissue or cells.

Types of Medical & Lab Freezers

There are four main types of medical freezers for your consideration:

  1. Upright Medical Freezer. One of the common types of medical freezers, upright models come in a variety of sizes. From countertop for the smallest operations with very limited storage, to full sized units equipped to handle the storage needs of the largest research facilities and hospitals, upright medical freezers can be configured internally using movable shelves to suit the types of storage you need.
  2. Undercounter Medical Freezer. Typically on the smaller side, undercounter or “built-in” freezers can be made to fit seamlessly into the space available without taking up valuable floor space. To allow for proper ventilation, these undercounter units utilize forward-facing vents. This feature may result in a higher upfront cost for installation, but certain models are available that do not require professional installation.
  3. Chest Medical Freezer. Similar to the large, top-opening “deep freezers” found in residential settings, a commercial chest freezer offers a lot of storage space. Despite its significant volume, keep in mind that a commercial chest freezer will not have the shelving upright models have that allow for orderly organization and easier access. Some have alarm systems to alert users if the temperature changes, as well as digital temperature displays and doors that lock.
  4. Ultra-Low Temperature Medical Freezers. If the materials you are storing require especially low temperatures, you will likely need an ultra-low temperature freezer. Designed to reach temperatures as low as -85°, an ultra-low temperature freezer is ideal for storing sensitive materials that require extremely low temperatures that must be reliably, certifiably, and consistently maintained. These models fit the bill for power and consistency, but they also use a lot of energy to maintain those ultra-low temperatures– you will likely see this reflected in your energy bill.

Purchasing Considerations

Chances are you’re coming to this purchasing process with at least a basic idea of what options your lab freezer should have to meet your needs. To make sure you choose the best freezer for your facility, we’ve listed out a few important factors that should be considered while browsing your options.

  1. Size.  One of your most important decisions involves balancing the amount and type of storage you need with the amount of space you have to dedicate to the freezer. Upright units take up moderate floor space, and often can be custom-configured using the flexible shelving included— providing easier, more organized access to smaller items. If floor space isn’t an issue, and you typically store larger items that are readily visible and accessible without the use of shelves, a chest medical freezer may be the right option for you. You will also want to keep in mind your potential storage needs when your business grows. Purchasing a small freezer now that barely meets your storage needs may save you money today, but will ultimately prove falsely economical if you need to buy a second unit in the near future when your storage needs expand. Selecting a larger model initially with “room to grow” will likely cost a bit more initially, but that extra cost will be worth it if the larger freezer is better suited for your lab long-term.
  2. Temperature. With the exception of “ultra-low” freezers designed to maintain a consistent temperature down to as low as -86°, most medical freezers offer temperature ranges between -18° and -25°— which is comparable to residential appliances. But don’t be misled. Compared to home freezer units, medical freezers provide temperatures that are far more precise, consistent, and sustainable. In addition, most medical freezers are equipped with important safety features— like digital thermostat displays on the outside of the freezer, and alarms that alert users when there’s been an unexpected change in temperature— to help ensure your materials are being stored at the correct temperature at all times.
  3. Cost. The amount of money you have to spend can place some restrictions on the type of medical freezer you can afford. Start by analyzing precisely what your needs are for storage, the space you have to dedicate to the freezer, and the budget you have to work with.
  4. Energy Efficiency. To conserve energy and manage costs involved, look for a lab freezer that is Energy Star-rated. You may need to consult the most recent EPA guidelines for Energy Star ratings for laboratory-grade refrigeration and freezers, but the extra research will be well worth it.

Features to Look For:

  1. External Digital Thermometer. Having a way to monitor your medical freezer’s internal temperature without opening the door and releasing cold air is important. A digital thermometer on the outside of the unit will allow you to easily view the temperature within the unit without opening the door.
  2. Lock. A lock will help keep out people who don’t have authorization to access the contents inside and minimize the frequency in which the freezer is opened. This is especially important in the case of some medications and chemicals.
  3. Glass Doors. See-through doors allow users to assess the contents without having to open the door.
  4. Combo Refrigerator/Freezer. Think about what your storage needs are. Does it make sense to invest in a tandem unit? You may find a refrigerator/freezer combo costs less and uses space more efficiently than buying the units separately.
  5. Temperature Alarm. Selecting a model that has an alarm that will alert you should the unit’s internal temperature change due to an electrical outage, malfunction, or user error will do more than any other feature to preserve the integrity your stored items.

Brands to Watch

  • American BioTech. A major player in the lab equipment and medical supplies arena with a good reputation for quality and service, American BioTech offers a wide selection of freezers in various sizes and designs. In addition to being reliable and solidly built, American BioTech’s line of medical freezers typically feature door locks and temperature alarms. They most often come with a warranty for parts and labor, which further backs up their reputation for reliability.
  • Like many brands included on this list, EdgeStar also deals in residential appliances as well as products for the medical and commercial space. Currently, the selection of medical equipment and supplies from EdgeStar is more limited than its counterparts, but its products have a good reputation for quality and reliability, and are receiving excellent user reviews.
  • Nor-Lake. Looking for a wide selection of medical freezers, including ultra-low temperature models specifically designed to store plasma? Nor-Lake is a great place to start. Their lab freezers are often energy-efficient, including special features like audio and visual temperature alarms and digital LED temperature displays. This is a growing company with a solid reputation for quality and reliability with an increasing number of satisfied users.
  • So-Low. Also a familiar name in lab and medical equipment, So-Low offers a wide range of lab freezers that can be used for various specialized purposes. Their freezers go through extensive testing to ensure they meet the exacting requirements of a medical environment, and most come with warranties to back that up.
  • Much like EdgeStar, this brand is better known for residential appliances, including a wide selection of refrigerators and freezers. On the commercial side, Summit has a moderate selection of medical freezers in various sizes that offer reliable and consistent temperature control and an array of special features such as temperature displays and locks.

When it comes to the performance of your new or used lab equipment— especially your freezer— the stakes are high. If your freezer malfunctions or breaks down, you may be facing the loss of important medical samples, blood or tissue that others have donated, or the credibility of the research you and your team have been working on. Choose carefully! Make sure you know precisely what your storage needs will be. Balance these needs against the space you have available for the freezer unit. Consider your growth needs, and by all means, go with a brand that has a solid reputation.

Posted on

Selling Your Surplus Lab Equipment

used laboratory equipment
January seems to be the month when we look around our homes and businesses and decide how we can organize and declutter– and that process often starts with an inventory of what we actually need vs. what we can “rehome” in some way. For example, if you work in a lab, you know firsthand: technology outpaces equipment at a rapid rate and we outgrow stuff fast. It doesn’t take long for that corner in the warehouse where “surplus stuff we don’t need anymore” lives to fill up.

Selling some of that surplus used laboratory equipment off will put some money back in your operations budget while clearing out some much-needed room… but you have a few decisions to make first.

First, you need to decide if you’re going to go it alone or partner with a professional lab equipment reseller. Even confirmed DIYers will tell you– using eBay or LabX can be trickier than you think. Acting as your own agent doesn’t necessarily mean you will keep more of your selling price when you consider the following factors:

• Are you starting from scratch on eBay or LabX? Previous selling history is a big factor in motivating buyers to trust an online seller. Unless you have some positive, peer-reviewed transactions with colleagues in the industry, your stuff is likely to get skipped over.
• How much time do you have? If you do get some action on a listing, be prepared to respond promptly– this audience is used to hearing from sellers within a few hours, so you delay at the risk of that seller’s rating you’re trying to build.
• Payment Processing. You’ll want to set up a PayPal account or something similar to keep your company safe from the kind of liability any sort of personal account leaves you open to– scams are not uncommon online. There are set-up and transaction costs associated with any of these third-party payers and vendor support is nearly non-existent.
• How are you going to handle shipping? Packing is expensive and shipping methods are pricey and on the rise.
• What’s your claims policy? Responsibility for the equipment or instrument reaching the buyer in working condition is yours. How will you address broken stuff on delivery when it happens? The cost of on-site service could very quickly absorb your profit.
• What about refunds? Do you offer a satisfaction guarantee?

Partnering with a professional lab equipment reseller like Bane Bio can facilitate this process in a number of different ways:

Consignment. You and your chosen reseller split the profit after we sell and deliver your item. Before the split, we deduct costs like refurbishment and testing. It can take a while to find the right buyer, but if you’re not in a hurry, this scenario may yield the best price.
Direct Sale. The reseller offers you a price for the item and takes it away. They pay for any marketing, testing, and refurbishing. It’s simple and a quick way to get paid if the item has value that the reseller feels is worth paying for.
Auction. Got a lot of equipment to unload? Closing or restructuring? Selling everything at once at auction can work well. Once the auction is complete, you receive a share of the auction price. There are fees associated with auctions, but you can sell a lot at once and you’ll know when you will be paid, even if the ultimate price is up to the bidders.

Maximize your chances of making top dollar by preparing your surplus lab equipment using three basic steps:

Collect each item for sale and be sure everything that goes with it, including all cables, dongles, and small accessories.
Clean and decontaminate all surfaces thoroughly, including the data it may contain. If personal accounts were used on the system, wipe them and create new generic admin and user accounts to allow the reseller to operate and access the system without using employees’ personal logins.
Document the manufacturer, model, and serial numbers of each component. Include a list of everything included–accessories, parts, or consumables. Provide the software licenses and keys. Providing the original invoice or packing slip and/or the service history of the system is also helpful. The more information that a reseller can have about the lab equipment you’re selling, the better.

Making a decision between choosing an experienced reselling partner or going it alone is a balancing act between time, effort, risk, and money. Only you can make that decision, but remember that Bane Bio is just a phone call or mouse click away to help you list your surplus equipment on consignment, or sell your items directly to us or to other companies at auction.

Posted on

The Benefits of Preventive Maintenance for Your Lab Equipment

lab equipment repair
Most things you own require some degree of preventive maintenance. In your personal life, your vehicle is a perfect example – you need to have preventive maintenance performed from time to time in order to improve the odds of reliable performance. The story is the same with laboratory equipment. If you keep up with the recommended preventive maintenance for your lab equipment, it’s far more likely that you’ll get a long useful life from each piece.

Let’s take a closer look at why preventive maintenance is a good idea. When you are ready to schedule this kind of work, please contact BaneBio for assistance!

Avoid Wasteful Downtime

In a busy lab, downtime simply is not acceptable. When you are without key pieces of equipment unexpectedly, you will have a hard time catching up – and falling behind in this way can have all kinds of other ramifications. While you’ll obviously have to stop using equipment for it to be serviced, the benefit here is that you can schedule the downtime at a point in the schedule which is convenient for the operation as a whole. Looking out ahead on your calendar and picking out spots to have service completed is the best way to reduce the productive time you lose to service work.

Save Money in the Long Run

It’s true that you will need to spend money to have preventive maintenance performed on your lab equipment, but that money is likely to be a wise investment when all is said and done. It’s usually more cost effective to get out in front of a problem than to let it get to the point where the piece of equipment needs major repairs – or needs to be replaced entirely. Try to see the big picture on this point and understand that investing in your lab equipment now should not be seen as an optional expense.

Remain Accurate

One of the most important reasons to keep up with preventive maintenance is to help your equipment stay on track from an accuracy perspective. Inaccurate equipment is virtually useless in a lab, so this motivation alone should be enough to pay attention to your maintenance schedule. A properly working piece of lab equipment is one you can rely on to offer the kind of accurate performance that your business or organization demands.

Keep It Simple

By working with BaneBio to handle your maintenance needs, you can keep things simple with regard to your equipment care. By having a go-to vendor for all of your preventive maintenance needs, you won’t need to waste time tracking down help when you realize that some type of work needs to be done on a piece of equipment. Build a relationship with BaneBio through consistent maintenance visits and we’ll be ready and able to handle many various issues that could pop up along the way. In the end, you don’t want to be bogged down with equipment maintenance when you should be focused on the work that your organization is trying to complete. Reach out today to learn more about what we can offer!

Posted on

What is Microscopy? An In-Depth Look

life sciences microscope

As a very basic definition, microscopy is the use of microscopes to view samples. These are samples which would not be visible to the ‘naked’ eye, so the microscope is used to dramatically magnify the objects in question. Most people are familiar with the use of a microscope from a science class they had in school along the way, even if that was years ago. Of course, the microscopes used by professionals in this field are a far cry from what is used by the average class of school children.

A Long History

While it is a decidedly high-tech field these days, the use of microscopes actually dates back many, many years. Humans have been attempting to magnify small items for viewing for centuries, and the microscopes available today represent the best of what mankind has been able to develop. If not for the considerable efforts of individuals hundreds of years ago, microscopy may not have developed into the advanced field that it has become.

The Basic Concept

So, how does a microscope work? For something so technical, it is a decidedly simple concept. The idea is to move light through a sample, either sending it directly through the sample or reflecting it, and then through one or more lenses in order to be viewed. Once a magnified image of the sample is created, it can be utilized in many ways. It may simply be viewed by the microscopist, it may be captured digitally for viewing later, or captured with a photographic plate. No matter what the specific plan may be, the magnification makes it possible to view things on a scale that simply isn’t achievable with the human eye alone.

Understanding the World

The uses of microscopy are too diverse to even attempt listing in this article. There are virtually countless potential uses for a microscope, but they all come back to the same basic idea – seeking a better understanding of the world and how it works. Microscopes are used extensively in the medical field, of course, but that is just the start. Anytime meaningful research is being completed in a scientific field, it is virtually certain that microscopes are playing some kind of role along the way. So much of what we know about the world is owed to the use of microscopes, and only time will tell what other discoveries microscopy will make possible.

Just Another Tool

At the end of the day, microscopes are incredible tools – but they are just that, tools. And tools need to be used by capable, knowledgeable people if they are going to be effective. So, as a field, microscopy depends just as much on the people looking into the microscope as the device itself. Without the well-trained scientists and other individuals who have learned how to use the equipment, and learned what they are looking for, the microscope itself wouldn’t hold much value. It’s the bringing together of human and machine that makes great things possible in this field.

Posted on

Must-Have Tools & Lab Equipment for Your Cannabis Business

cannabis testing

It’s no secret that the cannabis business has taken a big step forward in recent years. More and more states are voting to legalize the use of marijuana, and businesses are working hard to carve out their piece of the pie. If you are already involved in the cannabis business, or you are planning to get involved in the near future, you’ll need to have the right tools and cannabis lab equipment in order to succeed. Let’s take a look at some of the key items that you will want to consider while getting up and running.

Indoor Lighting for Plants

This is a pretty easy place to start. If you are going to be growing indoors, you are going to need the right lights to get the job done. Of course, there are plenty of growing lights available on the market today, so plenty of research will be needed before you make your purchase. Keep in mind things like electricity rates and the space you will need to light as you decide on the type of bulbs to use.

Worker Protection

Staying on the topic of lights, those who are consistently working around the lights should be wearing the appropriate UV protection. It can be harmful to be exposed to UV rays, so having things like sunglasses, hats, clothes, and more – all of which are rated for UV protection – is important. If your grow takes place outside rather than inside, the same concerns will be in place, only with regard to the sun rather than the lights.

HVAC Equipment

For an indoor growing environment, temperature control is one of the most important tasks you’ll need to manage. It’s essential to have the right equipment in place so you can control the temperature within the building with the necessary precision to keep the plants on track. Not only will poor HVAC equipment make it hard to maintain the right temperature, you also may find that your energy costs are higher due to the inefficiency.

Pest Management Gear

You are obviously going to need to keep pests at bay if you are going to have a successful crop when all is said and done. However, you can’t just pick up the first pesticide you find at the store and start spraying away. You will need to be sure to comply with legislation that applies to cannabis plants. Do a bit of research on this topic and have the right equipment and products on hand to manage pests effectively.

Security Equipment

To finish our list, we would like to discuss one point that probably will come up pretty early in your process. This is a business which naturally comes along with security concerns, so high-quality equipment to protect your property and your plants is essential. Cameras are a great start, but you will need to make sure they are installed properly if you are going to capture valuable information during a theft. In addition to security cameras, a secure vault where you can place plants is another vital piece of the puzzle.